
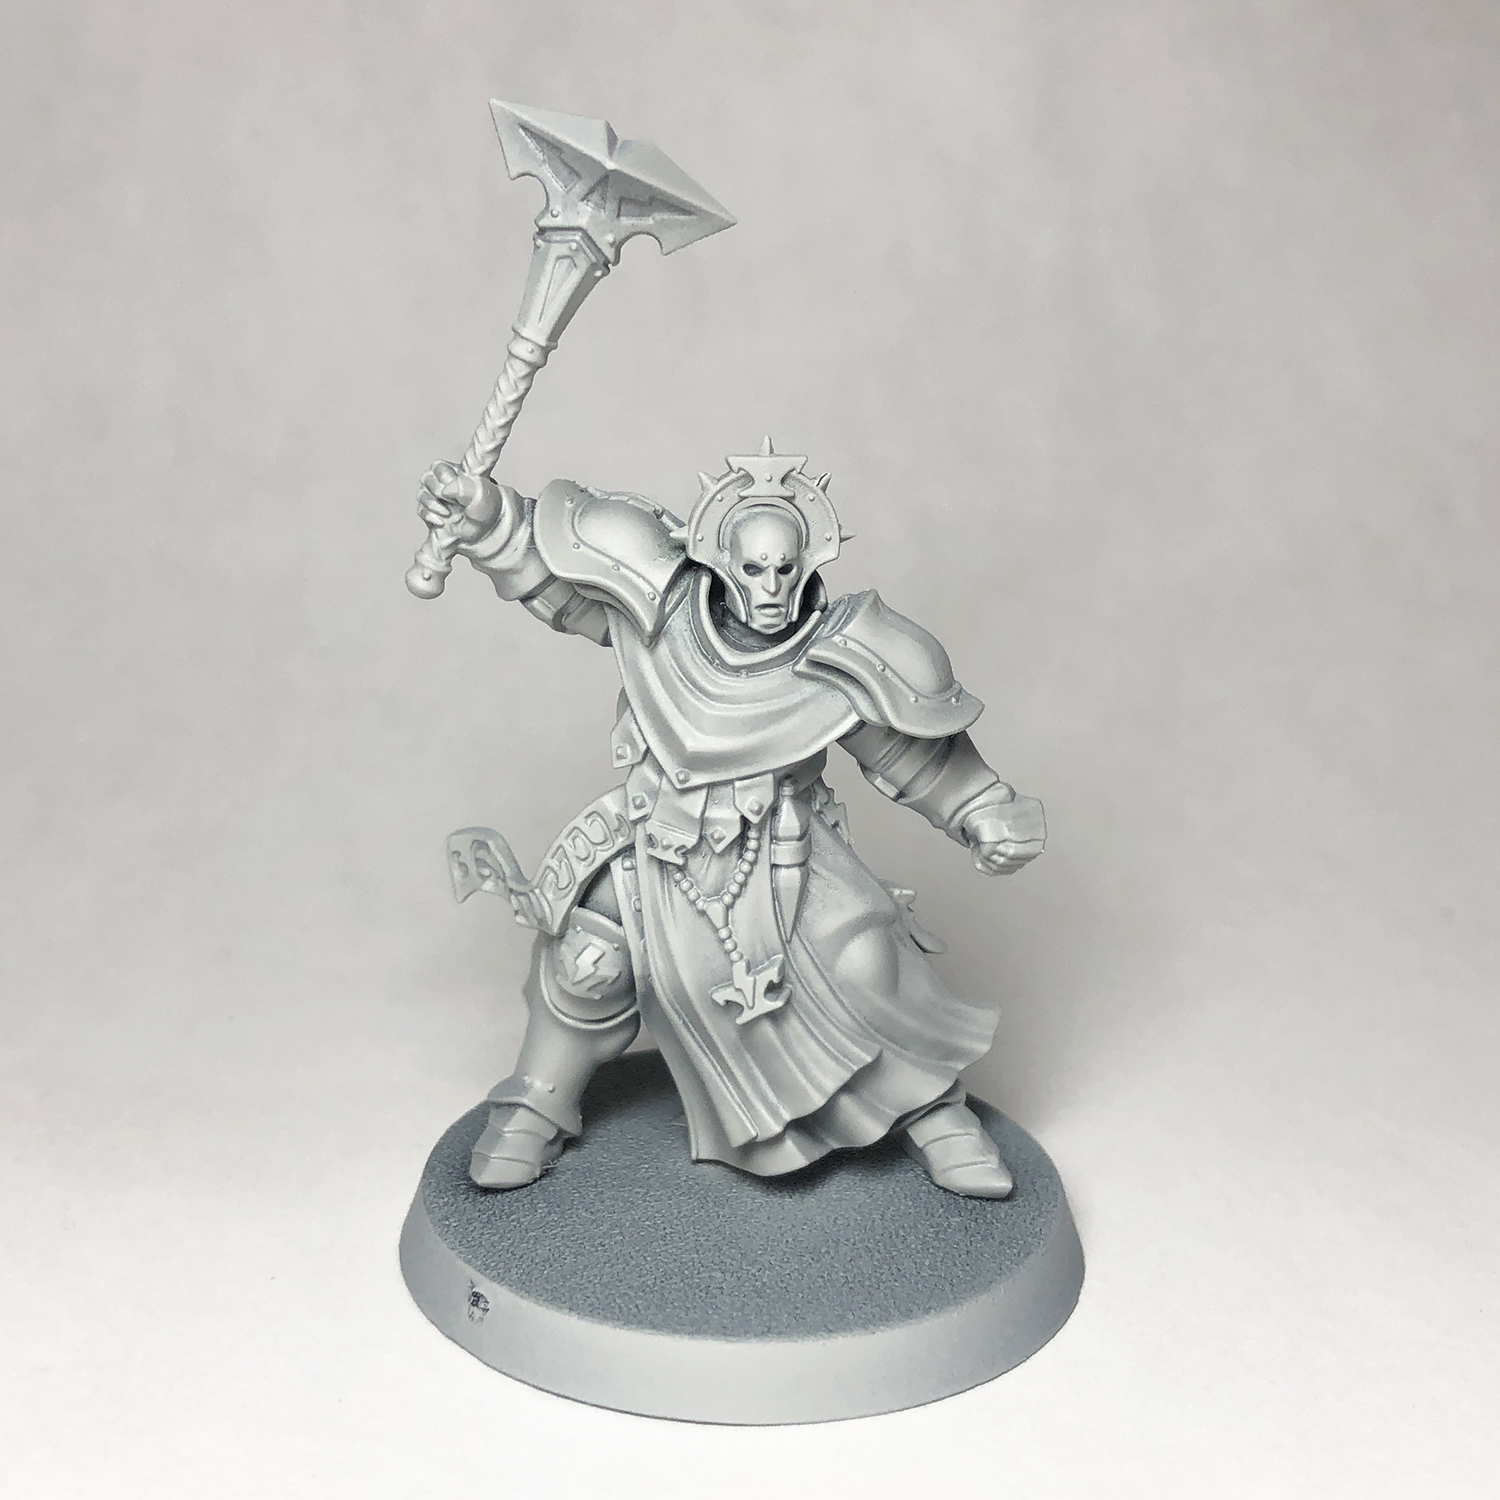
Step 1.
I primed the model with Grey Seer.

Step 2.
I decided to start with the red robes and other red areas. The reason I did this is because it's a fairly saturated color and if I accidentally get it on other areas I can touch it up with Grey Seer before doing the next color. This would be harder to do if the other color was already painted. For the red I used undiluted Blood Angels Red. On all future steps I cleaned up a little with Grey Seer if needed before moving onto the next color.

Step 3.
Next I painted the cream robes. These were done with a 3:1 mix of Contrast Medium and Aggaros Dunes. I chose this color because it's a little warmer than Skeleton Horde in my opinion. Make sure to get the inside of the robes between their legs as best as you can. Try and be as neat as you can, but don't worry too much if some gets on the armor as the black will cover it. Be more careful around the red though.

Step 4.
The armor was painted with undiluted Black Templar. Most of it was only one coat, but on some more prominent areas, such as the face and shoulder pads, I did two coats to get a more solid black. If you get any of this on the robes just wait until it's dry, cover up the mistake with Grey Seer, then paint the cream or red contrast paint over top, you won't really be able to see the patch after it's all done.

Step 5.
The crystal on their belt was painted with undiluted Aethermatic Blue.

Step 6.
All of the leather areas were given two coats of a 1:1 mix of Contrast Medium and Wyldwood. I do this in two thin coats to better control how dark it gets since Wyldwood is a fairly dark color and I want it to stand out from the black.

Step 7.
Now we're onto the highlights! The red areas were highlighted with Wild Rider Red. Just pick out the tops of the folds and the edges of everything. The weapon haft was given a very light drybrush of the same color.

Step 8.
I then did the same thing with the cream robes but used Pallid Wych Flesh to highlight it.

Step 9.
The black armor was then given an edge highlight of Administratum Grey. You want to be as precise as you can here since you want the highlights to be relatively thin. If you go overboard you run the risk of the armor looking grey instead of black. Luckily you can use Black Templar to tidy up any mistakes.

Step 10.
I highlighted the leather with Baneblade Brown. Just pick out the edges and folds.

Step 11.
The vial was highlighted with White Scar.

Step 12.
I decided to add a bit of visual interest to the cream robes with a line near the bottom of the tabard as well as near the bottom of the top part. I painted this on with Blood Angels Red to match the red robes. Just be as precise as you can hear and make sure your brush isn't overloaded with the contrast paint, otherwise you run the risk of it flooding the area you're painting. I also added a little triangle to the line on the top part for some flair.

Step 13.
All of the gold areas were basecoated with Retributor Armor.

Step 14.
The iron areas were given a basecoat of Leadbelcher.

Step 15 & 16.
The gold areas were then given a wash of a 1:1 mix of Reikland Fleshshade and Reikland Fleshshade Gloss. This helps it flow into the crevices better but cuts the gloss down a bit. I forgot to take a picture of the next step, which is doing the same thing with the iron, but using Nuln Oil and Nuln Oil Gloss.

Step 17.
All of the metallics were then given an edge highlight of Stormhost Silver.

Step 18 & 19.
Any lightning bolts on the model were basecoated with Grey Seer. Don't forget the shield! These were then highlighted with White Scar, and with that you're done!

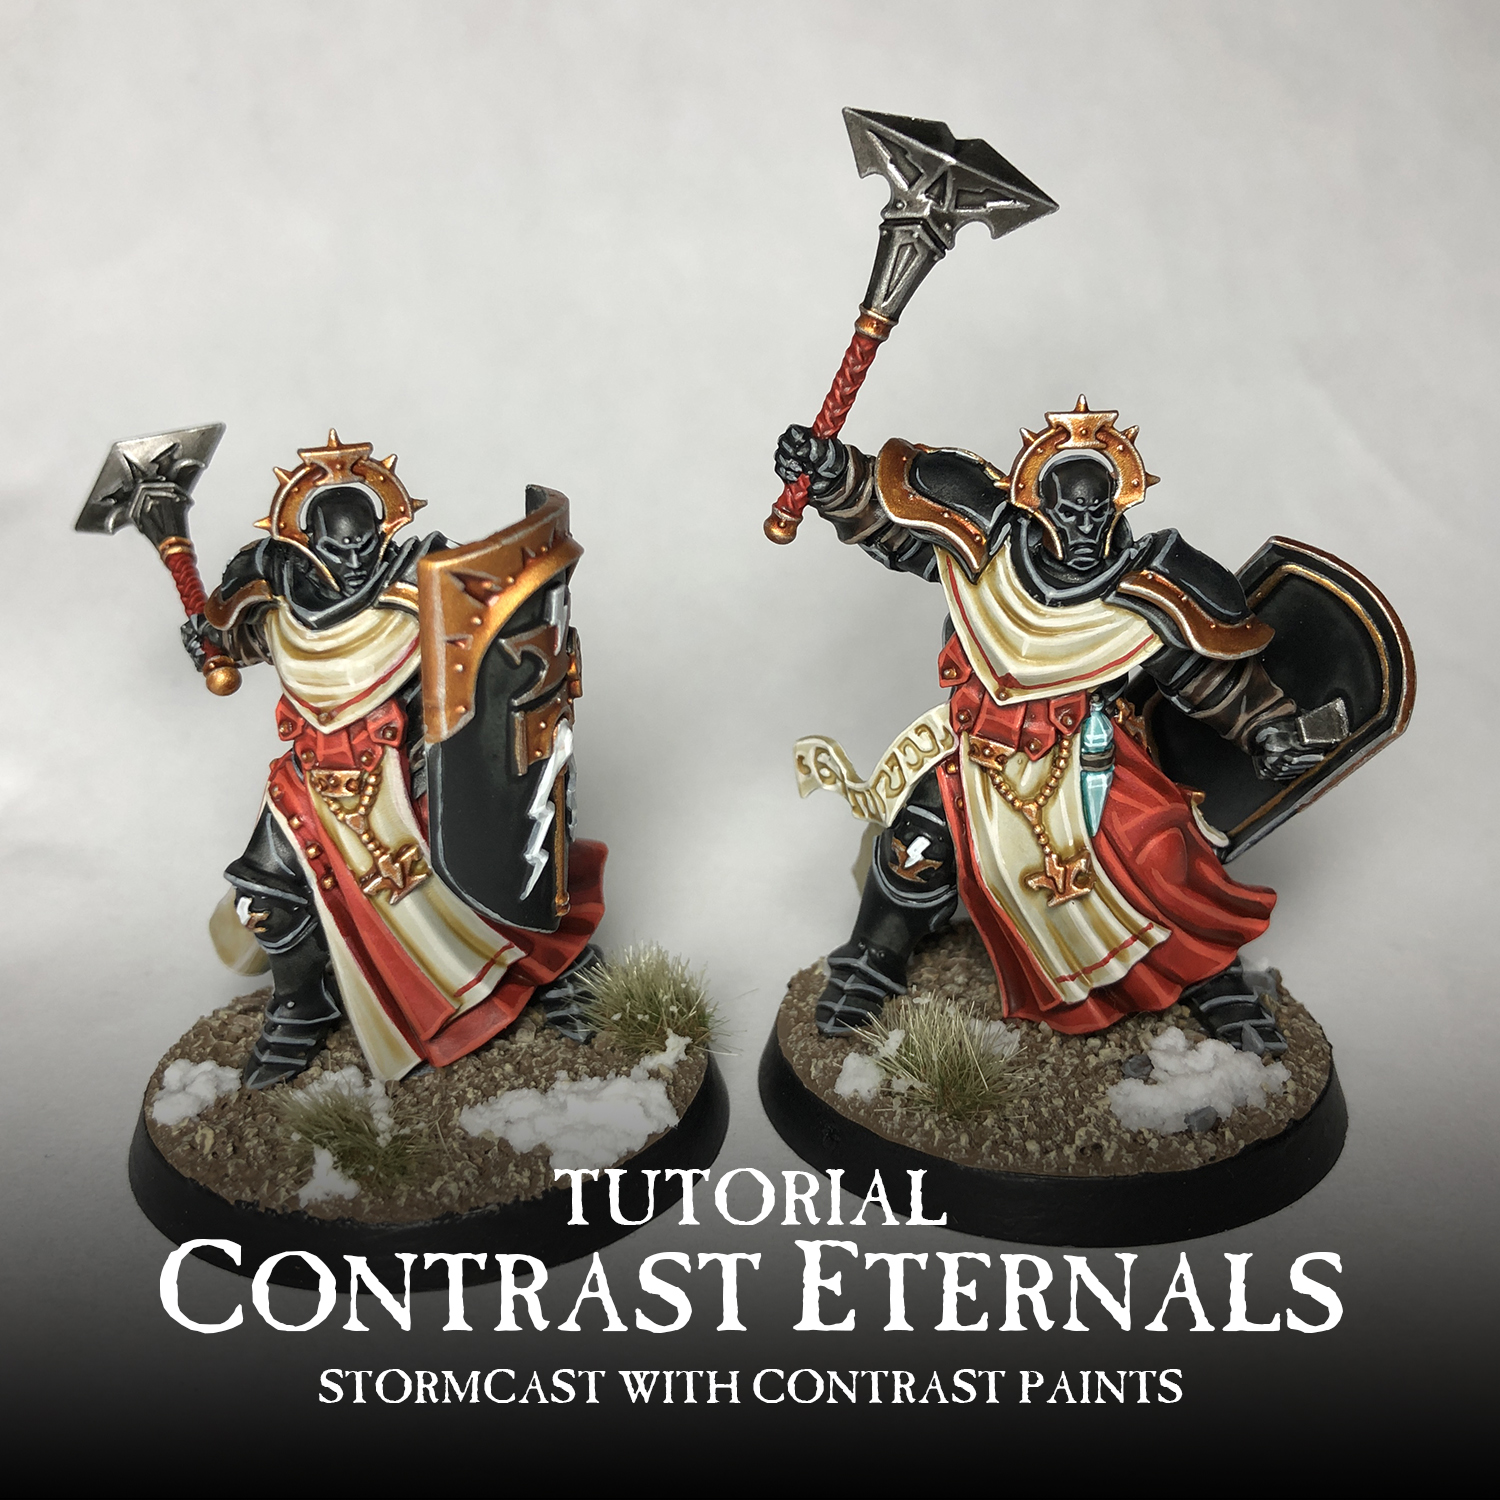
You can base your model however you want. For mine I did a basecoat of Steel Legion Drab over some sand and dry brushed it with Ushabti Bone. This was finished off with some Middenland Tufts and Valhallan Snow.

I also applied the lightning bolt transfer to their shoulder pads. To do this I first coated it with Stormshield to protect the contrast paint, and then applied it following this method. Once that was done I sealed the whole model with matte varnish. I did this step before the grass and snow. The first model took me around an hour and a half to paint, but I was also figuring out the color scheme on that one. The second one took longer simply because I had to stop and document every step, but I would say you could easily do a model in this method in under an hour once you have the flow down.
I may have to give this a try myself on some of the new models! If you do end up using this method on the new Stormcast I'd love to see it. Be sure to tag me on Twitter or Instagram whenever you post it.
Until next time,
Tyler M.
No comments:
Post a Comment