

Back when the Nighthaunt first came out with the launch of 2nd edition, they actually released two new technical paints designed to work specifically with them, Nighthaunt Gloom and Hexwraith Flame. The legendary Chris 'Peachy' Peach had a painting tutorial video shortly after that, showing how to use these on your Nighthaunt models, so I took the opportunity to follow his guide and see how quick and easy it really is. Spoiler, it's very quick and easy!
Most of this article is actually taken from my old review of these two technical paints, but I think the tutorial part of it is so useful I wanted to share it again. First off, if you're not familiar with these paints, they're basically new color variants of Nihilakh Oxide, in the form of a darker blue-grey and a bright green. You can think of theme as early predecessors to Contrast Paint. Nighthaunt Gloom is actually super close in color to Thunderhawk Blue if you want to color match it to a less liquid paint.
First off, let's take a look at Peachy's video guide on how to use these paints on the Nighthaunt models.

When painting mine I made a small change right away by mixing in a little Lahmian Medium to my Hexwraith Flame. This allowed it to flow better and didn't stain the model as strongly. This will give you more even coverage and also allow you to control the intensity of it. If you want it to be more saturated just add a second coat.

I then followed this up exactly as Peachy does in the video, by painting the upper cloth with Nighthaunt Gloom. After two coats of it I had a pretty solid base coat. This just goes to show you how much this darker color covers compared to Oxide.

As I continued on I made a couple more small tweaks to Peachy's guide. I really wanted to try out the bone skull look that the studio's army has. Tidy up the skull with Corax White from anywhere the previous colors got on it so we have a nice solid base coat to work with. I then washed that with Seraphim Sepia.
There was no wood color in the video, so I chose Abaddon Black. At this point, with all of the robes shaded and base coated, along with the skull and wood, I drybrushed the whole model with Ulthuan Grey. I did this in the same manner as Peachy does, while also being fairly light on the wood and skull as well so as not to overpower those colors.
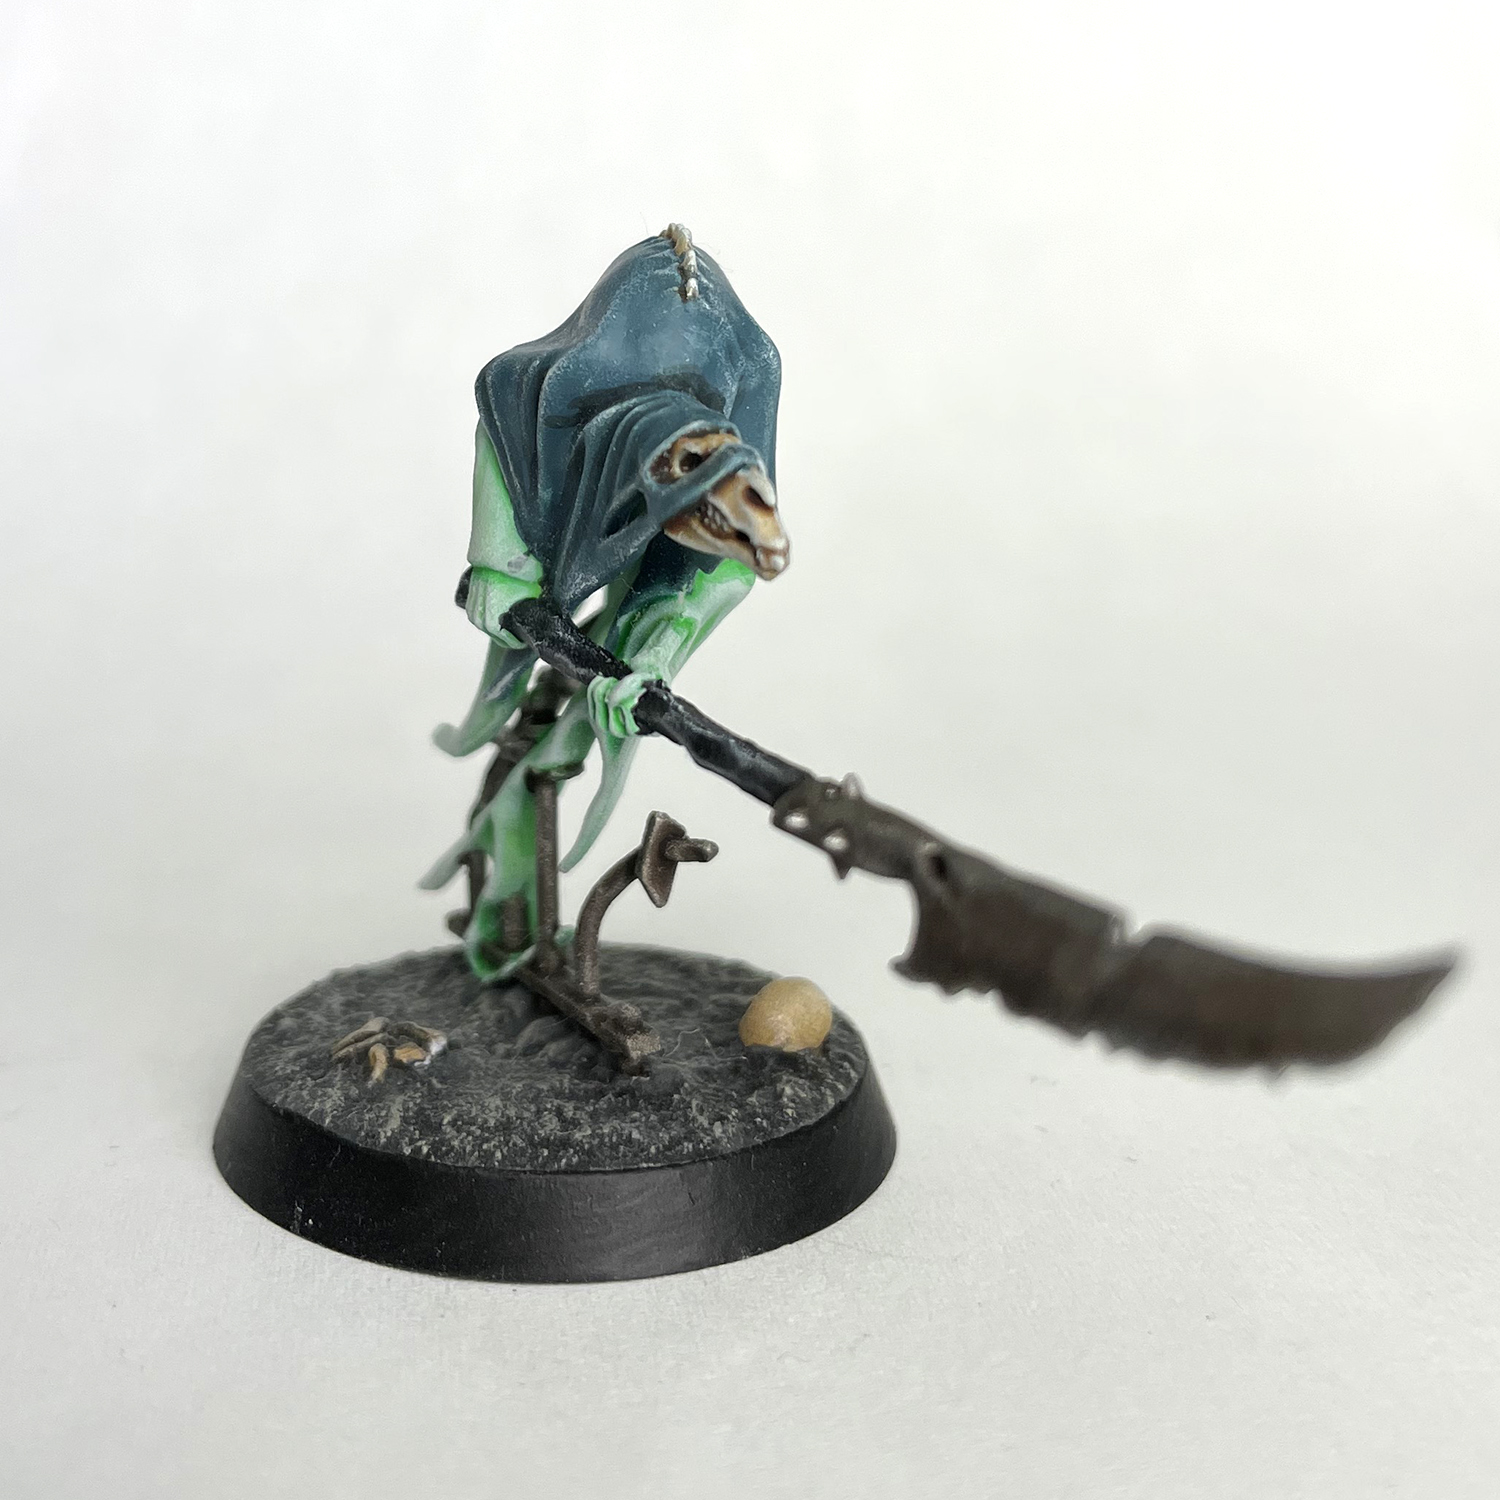
I wanted a little more contrast on the Nighthaunt Gloom cloth, so I painted a little bit of Nuln Oil directly into some of the folds. I then painted the metal the same way as he did, but finished it off with a drybrush of Necron Compound.
Painting Nighthaunt using these colors and methods, even with the changes I made, is super quick and probably amounted to maybe five to ten more minutes per model. I think the key to this method is having good control over your drybrushing. I went much heavier on the green areas, and lighter everywhere else. On the green areas you're trying to build up the off-white color again, where as on the cloak, skull, and wood you're just looking to catch the edges to do a quick highlight.
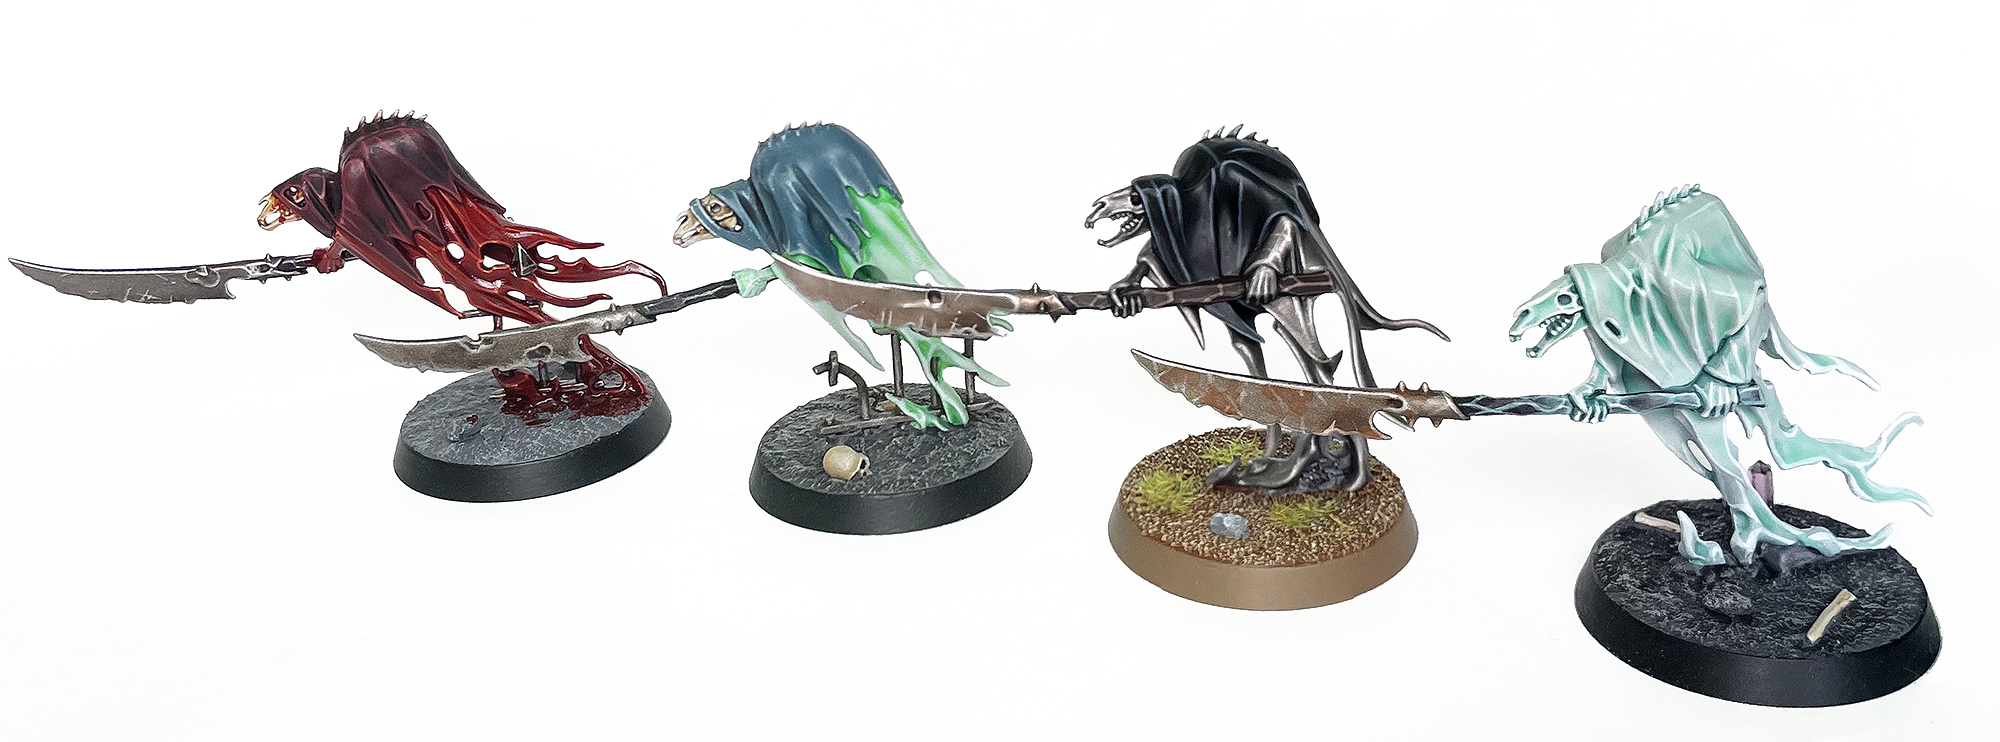
Now you have at least four different ways to paint your Nighthaunt models! This method, my classic method, the Scarlet Doom, and the Quicksilver Dead. You could easily make this version into the Emerald Curse too if you switch the Nighthaunt Gloom cloak to a darker green as well.
Stay spooky!
Until next time,
Tyler M.
No comments:
Post a Comment