
Like I have said before, sometimes as a painter you are working on something as cool as a Primarch and other days you get to paint a pile of rocks on his base. The difficulty comes in convincing yourself it is worthwhile to paint the rocks to the same standard as the rest of the model. It's easy to be excited about painting an awesome sculpt, but sometimes the mundane parts of it may wear tour patience a little thin. In the end though you know the model as a whole must be to the same standard so you plow ahead and spend six hours painting a few rocks, carefully blending them.
In the case of the Casket of Souls the equivalent of rocks is the massive pile of bones that surrounds the base of plinth. Luckily for me I am only painting this to a slightly higher then normal "high end tabletop" standard.

Since I had sprayed it with a bone colored primer I started off by just giving all of the bones a wash of Agrax Earthshade. This was followed by a dry brush of Screaming Skull. The dry brush is to rough to leave that way though so I then went back with Screaming Skull and cleaner up each skull and rib cage. For the skulls, which have a lot of fairly large flat areas, this required me to water my paint down a ton and use it almost as transparency to help blend from the shaded crevices to the highlights in several very thin layers. Luckily there are so many bones that by the time I finished the last one, the first one was already dry. This was then followed with a highlight of pure white. First I picked out the most obvious highlight areas, such as the brow, cheek bones, etc, and then I did the same thing as I did with the Screaming Skull and blended using very, very thin white paint. To preserve my sanity a bit I broke the bones down into three areas and painted each one to completion before moving on to the next. This gave me a small sense of having finished something without having to wait hours to get the whole pile done.

After that was the sand which I painted with a basecoat of Tausept Ocher and drybrushed with Screaming Skull. Once done I decided to add some more sand piles to the top of the plinth to blend the pieces together more and also along the sides of it to help distract attention away from the skulls holding the plinth up. I painted these as gold, but the sculpts on them are just so horrible some of them just look like skull shaped blobs. I think the mold has deteriorated a bit, because I got several replacement parts, but they were all just as bad. Once the sand was dry I painted the same as the rest of the base.

The bugs were picked out in black and highlighted by mixing in Hawk Turquoise followed by a little white. All of the rocks and the rim of the base were painted with Calthan Brown.

This Thursday I will have a step by step tutorial on how to paint the marble, so be sure to check back for that.


I am toying with the idea of adding something more to the base, maybe a ruined pillar or even something as simple as some more skulls and bugs near the edges, but I am waiting to see the whole thing assembled to make sure it won't be to cluttered.

I picked out the hieroglyphics with Scorpion Green to match the casket.

Parts of the base may have been slightly tedious, but I really like the finished look. That's what you have to keep reminding yourself when you're painting something you aren't that excited about, it will look awesome in the end and all be worth it.

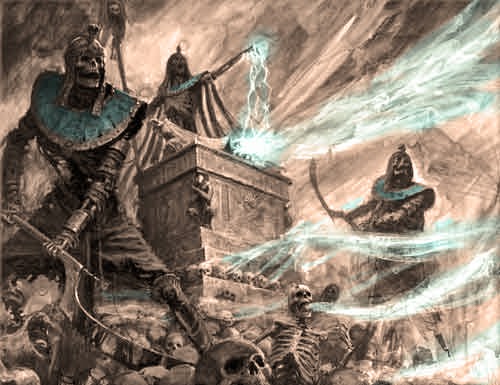
I also got a bit more work done on the casket and finished the screaming ghost skull.
Until next time,
Tyler M.
No comments:
Post a Comment