
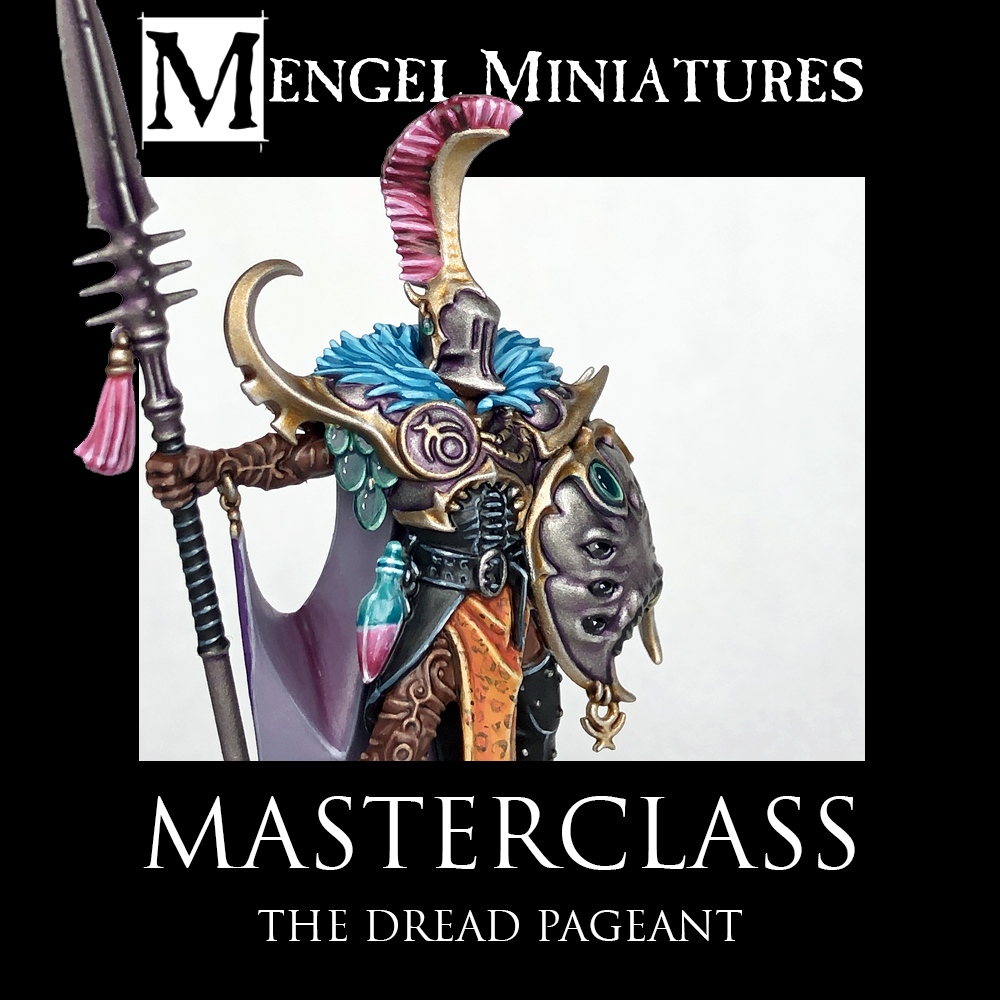
The moment I saw the previews for the Dread Pageant warband I knew I had to paint them up. I love the Persian influences on everything and also figured the vibrant colors of Slaanesh would give me an opportunity to play around with some colors I don't normally use.

This warband has a lot going for it, beyond just the overall design. I really love the range of models. You have a semi-armored knight like figure with Visillac, two lighter, skirmish type fighters with Hadzu and Glisette, and a hulking, mostly skin covered monster with Slakeslash.

This gives you a lot of opportunities to play around with different colors and skin tones. I knew right away that I wanted to go with a more mid-range skin tone on Glisette, as well as the pink hair. The rest of her scheme kind of came along as I painted her.
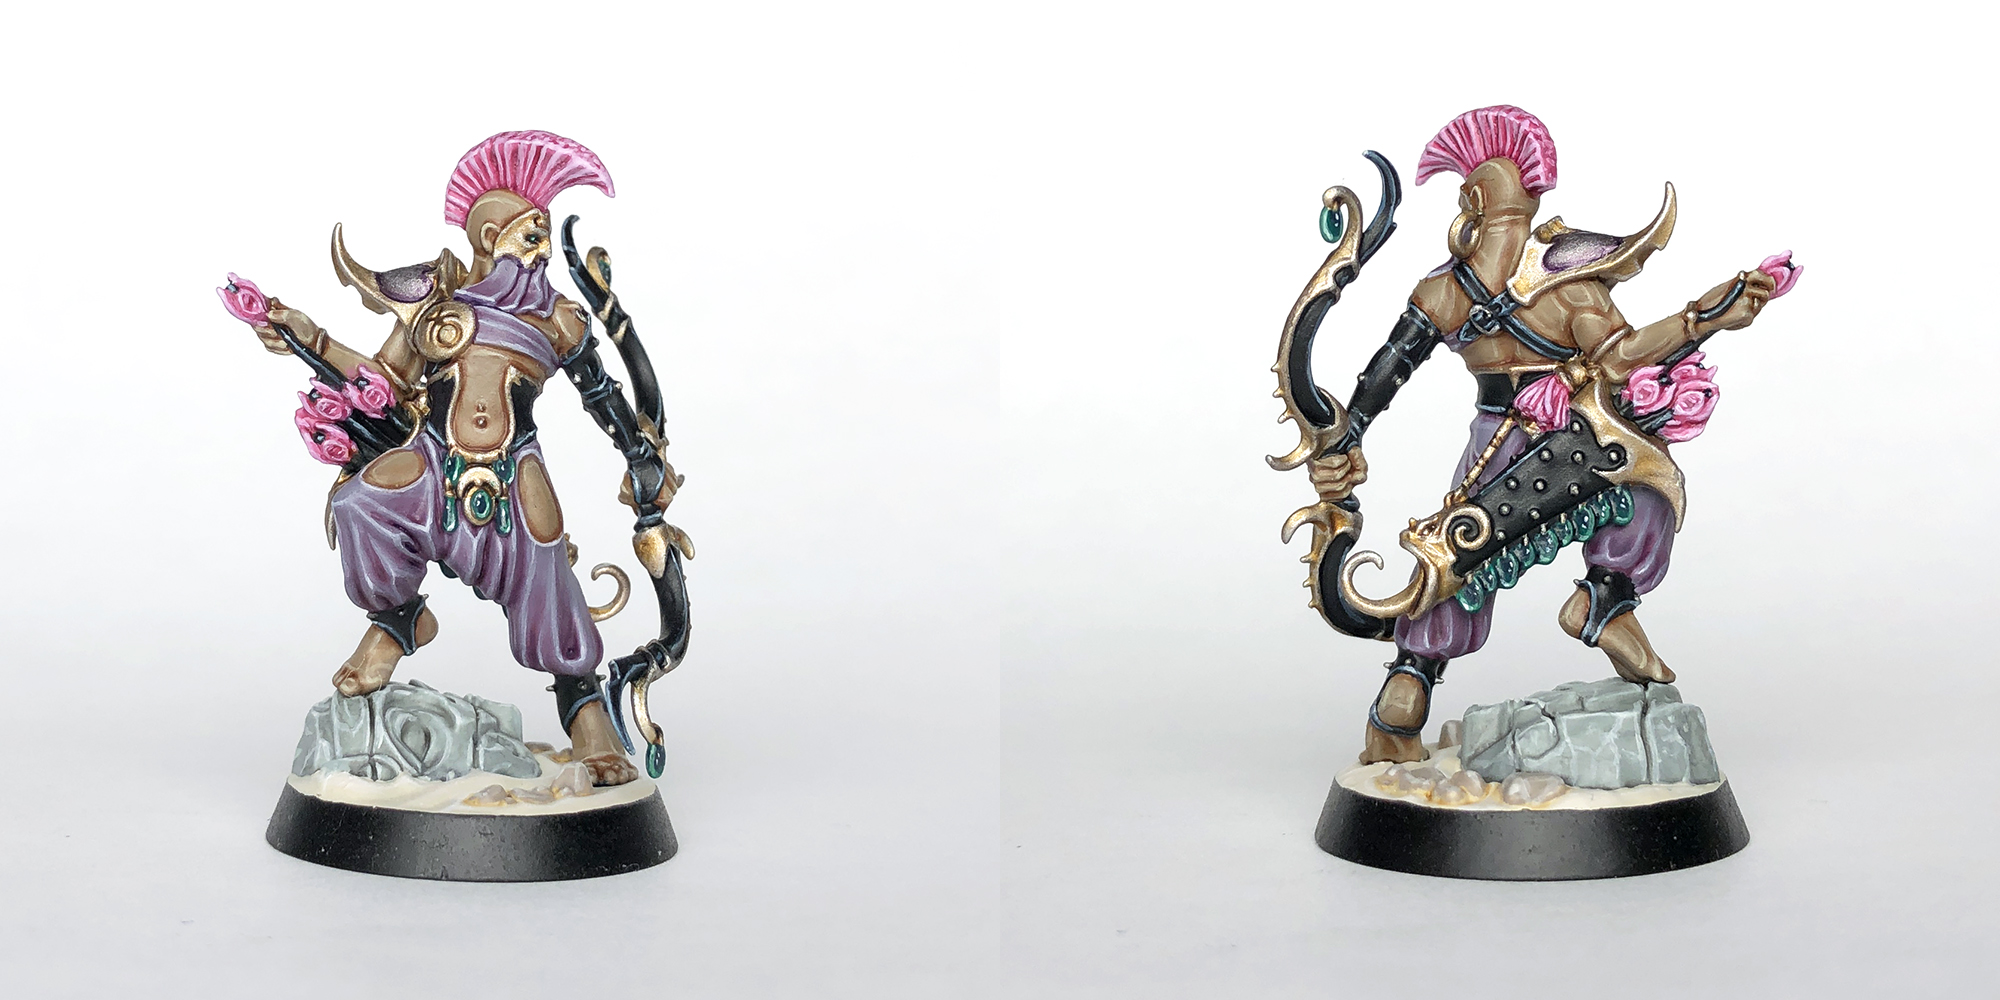
Another thing I knew I wanted to do early on was to use Canoptek Alloy as my gold color. I've gotten used to using Retributor Armor for all my gold, but I figured on these models I would try something a little lighter and closer to platinum. Originally I was going to paint Hadzu's hair a bright blue, but decided to stick with pink as one of the unifying colors of the warband. He's mostly painted the same as Glisette though.
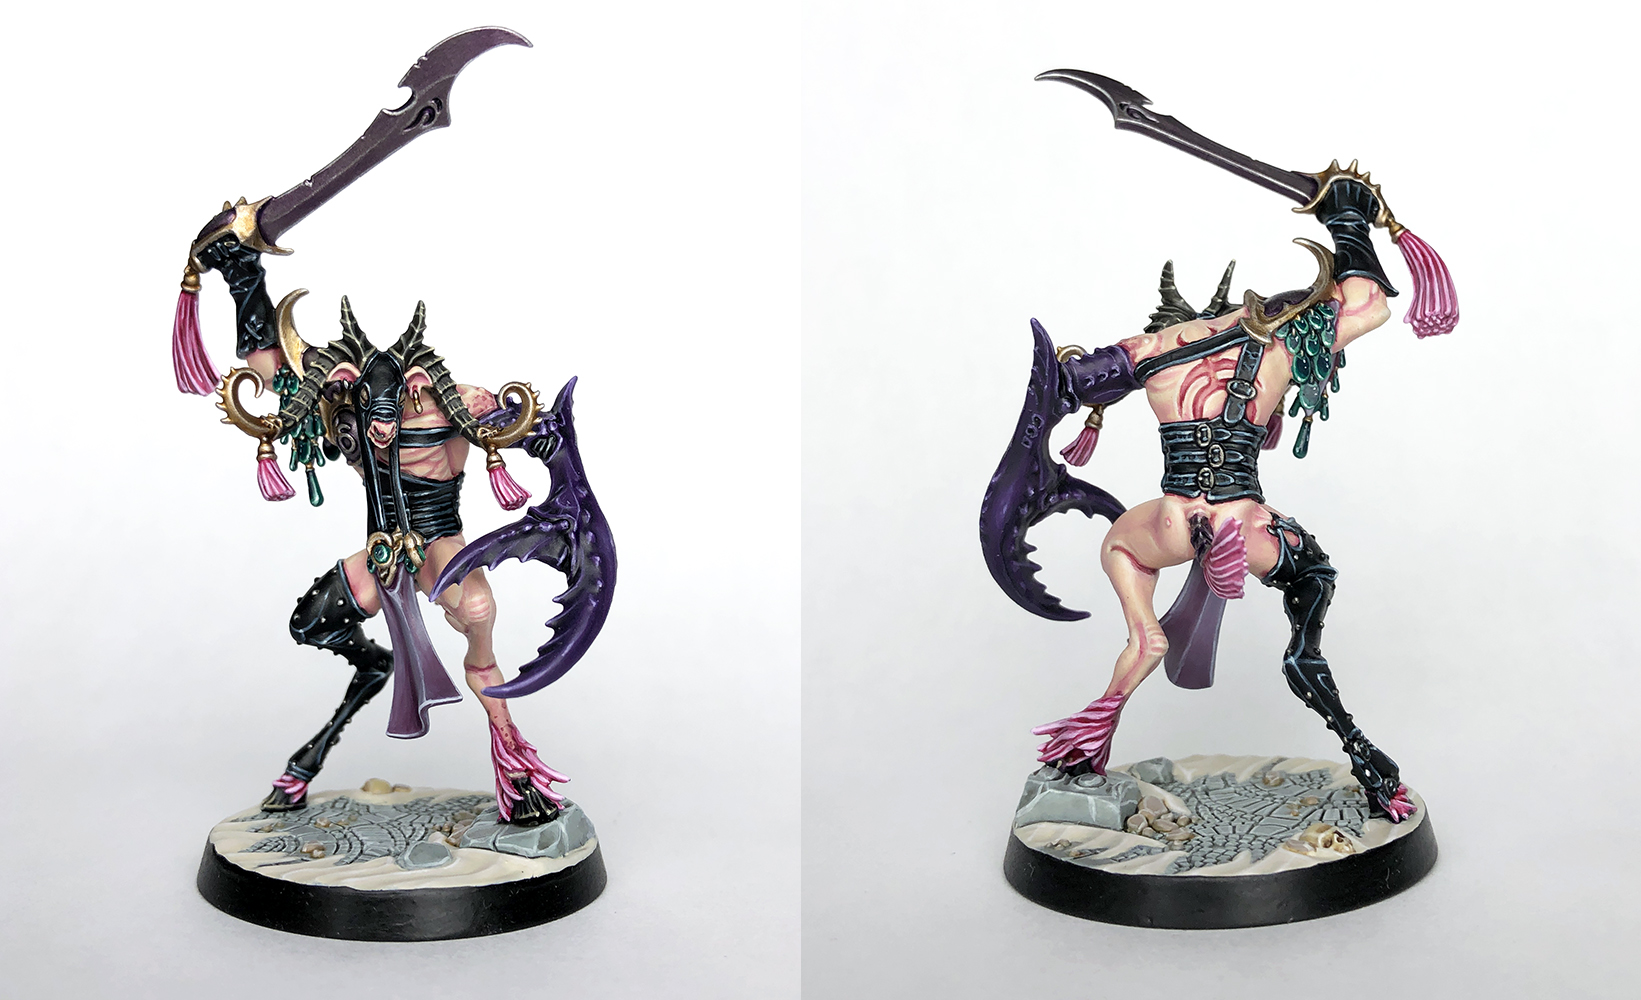
One thing I've really enjoyed doing with the Underworlds warbands is to use Contrast paint as a shade instead of as an all over wash. I find that these are a lot more vibrant than the Shade range and really add an extra punch to the models. Slakeslash was a lot of fun to paint since he has so much skin. I knew I wanted to try and make it as smooth as I could and decided to go for a very pink tone for him.

Visillac is the leader of the warband, and as such I thought he should look the most extravagant. He keeps all the best spoils of war for himself. I also decided to go with a darker skin tone with him to vary it up a bit. I had a lot of fun painting the leopard skin loincloth, and I like to imagine that maybe the fur is from a Mindstealer Sphiranx that he hunted down. This tutorial is a bit more advanced than my normal step by step tutorials. It involves a lot of blending, glazing, and going back and forth between steps. It also follows the old 'Eavy Metal Masterclass style guides' format.
The Lilac Cloth

All of the lilac cloth on the models was base coated with Warpfiend Grey. I then took a 50/50 mix of Magos Purple and Contrast Medium and painted it only into the folds. Once this was dry I went back and defined the folds a bit more with a second coat of this where needed. After that I mixed some Magos Purple with Lahmian Medium and used it as a glaze on the bottom half of the cloth to create a fade. I only did around two coats of this, but you can do as many as you want until it's as dark as you want near the bottom. After that I went back with Warpfiend Grey and tidied up a few areas as well as highlighting the creases of the folds on the darker areas near the bottom. To add a bit more depth in areas, I painted a little bit of watered down Shyish Purple into the deepest folds, usually near the bottom of the cloth. This is just to accentuate where needed.

Next I started highlighted the creases and edges by mixing in White Scar to the Warpfiend Grey. I did about three layers of this, mixing in more white with each layer and focusing more and more only near the utmost edges and corners as I got brighter. On several of the models I went back after all of the other colors were done and added one last highlight on the most prominent areas to brighten it up a bit more.
The Medium Skin Tone

For the skin on Hadzu and Glisette I base coated them with Baneblade Brown. I then used Darkoath Flesh mixed with Contrast Medium and painted it into the recesses and where I wanted to create fades to a dark color, like on their stomachs. I repeated this where needed to darken down the recesses more. I then used undiluted Darkoath Flesh to line certain areas, like where the skin touches cloth or metal, or between the fingers. I then tidied up where needed with Baneblade Brown, but I didn't have to do a lot of this. For the highlights I mixed in Screaming Skull to the Baneblade Brown and focused on this lines around the edges of the muscles. I did around two to three layers of this, adding in more Screaming Skull with each layer and being more refined with it, just like with the cloth. Like the cloth as well, I went back once all of the other colors were done and added in a final highlight on the most prominent areas to brighten it up a bit.
The Black Leather

All of the black leather areas were base coated with two coats of Black Templar. You just want to have a solid coat of this in the end, so do more layers if needed. I then edge highlighted it with Thunderhawk Blue, followed by a more refined highlight of Fenresian Grey, and lastly, some dots of Ulthuan Grey on the most prominent areas. Thin lines are key here since you want it to still read as black and not grey.
The Hair

For Hadzu and Glisette I base coated the hair with Emperor's Children. This was then shaded with a 50/50 mix of Volupus Pink and Contrast Medium. Next, I highlighted it with Fulgrim Pink, and then mixed a little white into the mix to pick out the very ends of the hair and any other prominent areas. If the Volupus Pink is too strong or dark in any areas you can glaze it with a bit of Emperor's Children to lighten it up a bit. I used this same combo of colors for the tassels, arrow fletchings, and any other pink areas. I also used this for the fur on Slakeslash.

On Visillac I decided to give him some darker stripes in his mohawk. To do this I painted those stripes with several coats of Carroburg Crimson, probably about four or five. I did this after the entire mohawk had been shaded and highlighted already as above. Once this was dry I used some watered down Abaddon Black around the base of the mohawk on those stripes, and then highlighted the top half of each strand with Emperor's Children, and the very tip of each strand along the side with a dot of Fulgrim Pink.
The Silver Metal

All of the silver areas were base coated with Leacbelcher. Next this was washed with thinned down Druchii Violet. I didn't bother shading things like the studs on the leather. Any edges were then picked out with Stormhost Silver. On the shoulder pads where there are no edges I watered down the Stormhost Silver and kind of glazed it on near the top part, to lighten it up a bit. On the shield I made a 50/50 mix of Stormhost Silver and Leadbelcher for the base coat, and then shaded it as above. This was then glazed with the base coat mix on the flatter areas, followed by more refined glazes of pure Stormhost Silver and then edge highlights. If the purple feels like it's getting lost at all you can glaze a little back on in places. I also picked out the areas between the silver and gold with some watered down Shyish Purple to further define it.
The Gold

All of the gold areas were then base coated with Canoptek Alloy. This is an almost platinum like gold/bronze. I then washed all of these areas with Seraphim Sepia to tint it a bit more golden. The I went in with some Agrax Earthshade to pick out the deepest areas in it. This was followed by a bit of Wyldwood where I really wanted a dark shadow. I only painted this directly into the crevices where I wanted it. Next, I highlighted all of it with Canoptek Alloy again, picking out all of the edges and being a bit broad with these highlights. If I felt like I was losing the yellow tint a bit in place I would glaze some Seraphim Sepia back onto the model in a controlled fashion. This was finished off with a final highlight of Stormhost Silver on the very edges.
The Gems

I decided that I wanted the little gems and discs hanging from them to look like shadeglass. I base coated all of these with Kabalite Green. I then went in with thinned down Incubi Darkness and painted the top left corner of all of these to get the gem like shading. Next I edge highlighted all of them with Syrabite Green. On the teardrop shaped gems I only did this along the right side and the bottom a bit. This was followed by some Gauss Blaster Green only along the bottom right corner. Finally, I added a dot or two of white to the top left corner, and a little bit of white in the bottom right corner for the light reflections. I also painted the eyes on the masks of Hadzu and Glisette at the time time, but I skipped the Incubi Darkness and white.
Slakeslash's Skin

Slakeslash's skin was base coated with Flayed One Flesh. This took two or three coats to get solid coverage. I then went overtop of this with a 70/30 mix of Contrast Medium and Volupus Pink. This gets almost entirely covered up later, but provides some of our deepest shadows, and also acts as a bit of an underpainting, helping us figure out where to place shadows and highlights. Next I made a mix of Flayed One Flesh with just a little bit of Emperor's Children mixed in. This is essentially the mid-tone of our skin. I thinned it down quite a bit so it's almost a glaze like consistency. I then painted over all of the areas that weren't shadows with this. I also glazed this over some of the shadow areas to even it out more and brighten them up, especially on shallower shadows. I then thinned down pure Flayed One Flesh to the same consistency and did the same thing, but focused only one the raised areas that would get highlights. Keep this fairly broad though. After that I went back to my original mix, but mixed in even more Emperor's Children so that it was more pink with a hint of flesh tone. Thinned down in the same, this was then painted into some of the shadow areas. I then took Voulpus Pink thinned with water and re-defined some of the darkest shadows as well as lining some of the areas that touch other colors to better separate them. Keep this very minimal. For the final highlights I did a 50/50 mix of Pallid Wych Flesh and Flayed One Flesh and focused on the raised areas and edges. Keep this more refined than the last highlight. The final highlight is just pure Pallid Wych Flesh on only the most prominent areas. I did a lot of going back and forth on these steps and lots of glazing to get smooth transitions. There isn't an exact science to this, so if something feels to dark, or to light don't be afraid to go back and adjust it.
Slakeslash's Claw and Visallic's Cape

Purple is the color most associated with Slaanesh, so even though I had a nice lilac color for some of the cloth, I wanted a more vibrant color in some spots too. I base coated the claw with Xereus Purple. I then went over all of it with a 50/50 mix of Shyish Purple and Contrast Medium. Now, I pretty much ended up going over all of this later, so it acted more as a guide on where to place shadows and highlights. You can skip that step if you don't want to do it. I then went back with Xereus Purple and picked out all of the raised areas again. This is our mid-tone color. The shadows were glazed over with a Xereus Purple/Abaddon Black mix. I then basically went back and forth with this mix and pure Xereus Purple, glazing and using thin layers to get more subtle transitions. Once this was done I mixed some Dechala Lilac into the Xereus Purple and highlighted the edges and started doing some more shallow highlights, like along the side of the claw. For anything that isn't a hard edge you will need to do thin layers and glazing, just like with the shadows, to get a smooth transition. I then did another layer of this mixing in more Dechala Lilac, and then finished with pure Dechala Lilac on the most extreme points. The whole claw is really just those three colors, with adjusting mix ratios and lots of glazing and thin layers. If I had to hazard a guess, from darkest color to final highlight, it's probably about 7 layers, with the Xereus Purple right in the middle.

The outside of Visallic's cape was painted using the same colors and methods, but I entirely skipped the Shyish Purple step and just went straight to the Xereus Purple/Abaddon Black mix.
Slakeslash's Horns

The horns for Slakeslash were base coated with Stormvermin Fur. These then got two coats of Nuln Oil. Once dry I edge highlighted the horns with Stormvermin Fur again, as well as painting growth lines on the interiors of them. This was followed up with Karak Stone in the same manner. Finally, I dotted all of the points along the horns with Ushabti Bone. His hooves and the teeth on Visillac's shield were painted in a similar way, but were base coated with Black Templar first, and then I skipped right to the highlights.
Visillac's Skin

I wanted Visillac to have a darker skin tone and figured this was the perfect time to try out GW's new dark skin tone paints. I base coated his skin with Bloodreaver Flesh. I then covered all of it with a 50/50 mix of Darkoath Flesh and Contrast Medium. Next I went in and picked out some of the areas I wanted darker with watered down Wyldwood. This was followed up by re-layering all of the raised areas with Bloodreaver Flesh. Next, I highlighted it with Knight-Questor Flesh, picking out the edges of muscles as well as all of the scarification. Some of the shadows were to dark or vibrant for me, so I went in with some watered down Catachan Flesh and glazed over them. I then followed up the highlights with a more refined highlight of Cadian Fleshtone, and also got all of the scarification. Then I used some Kislev Flesh to pick out some of the points and intersections of the scarification with little dots. This ended up being to bright, so I very carefully glazed the scars with Knight-Questor Flesh to knock it back down a bit.
Visillac's Leopard Cloth

For his loincloth I decided to go for a bright leopard print look to really drive home the garish feel. I started with a base coat of Tau Light Ochre. I then thinned down some Jokero Orange and glazed this onto the middle section and into the folds. This way it's lighter towards the outer edges of the cloth. I then made a 50/50 mix of Jokero Orange and Squig Orange and further darkened down the folds and also glazed this onto the bottom quarter of the cloth to get a bit of a gradient. This was followed by pure Squig Orange, but only used for the shadows I wanted really dark. I also kept it pretty thin so I could control the darkness of it. Next, I went back and highlighted all of the edges and tops of the folds with Tau Light Ochre. Be a bit broader with this. I then mixed in some Ushabti Bone and did a more refined highlight, followed by a final highlight of pure Ushabti Bone. The darkest areas of the folds were shaded with a tiny bit of watered down Doombull Brown.

For the spots themselves I used watered down Black Templar and just carefully painted little blotchy circles all over. You want to vary the size and make the placement somewhat random. You don't need to be super precise with this, and in fact, you want the width of the line to vary a bit. After this was done I painted little blobs of thinned down Squig Orange into the center of each circle. I thought the spots were to dark and distracting once I was done, so I went and glazed over top of them with either very watered down Tau Light Ochre or Squig Orange, depending on if the spot was in shadow or not. This was super thin and just used to blend the black into the orange a bit more, but go over the whole area, not just the spot. Fix and adjust any highlights as needed afterward. I didn't do any spots on the back of the cloth at all.
Visillac's Blue Fur

I decided I wanted the fur to be super bright on this model to play off the loincloth a bit and also be a very vibrant color. I base coated it with Sotek Green. Next, I layered it with a mix of Sotek Green with some White Scar. I basically covered the entire thing except for the recesses, so this is the mid-tone color. I then did two more highlight layers, mixing in a little more White Scar each time, and getting more refined with each layer. The final highlight is basically white with just a little bit of Sotek Green mixed in and used only on the tips of each piece of fur.
Visillac's Vial

I base coated the vial with Grey Seer. This then got an all over wash of Aethermatic Blue. I then painted the liquid on the bottom half with some thinned down Emperor's Children. By keeping it thin it lets the color of the glass show through a bit. I then painted the top of the liquid with some thinned down Fulgrim Pink, and the bottom half with some thinned down Volupus Pink. For the clear glass half I shaded it down some more with some Aethermatic Blue and Akhelian Green for the darkest areas. I painted these on carefully to create the idea of reflections and shadows. This was then highlighted with Grey Seer, using thin lines and dots. Have some of the lines go over both the empty glass and the liquid for the reflections. This was finished up with dots of White Scar for the brightest reflections.
The Bases

The stonework on the base was base coated with Celestra Grey. This was then shaded with slightly thinned down Nuln Oil, then edge highlighted with Ulthuan Grey. All of the sand was base coated with Wraithbone. You want a really solid coat of this. I then used Pallid Wych Flesh to pick out the little dunes, following along the ridge in a fairly broad line. I then picked out the very tops of the ridges with a line of White Scar.

The rocks were hit with a light wash of Seraphim Sepia, mostly to outline them. I then base coated the rocks with Rakarth Flesh and highlighted them with Pallid Wych Flesh. The skulls were base coated with Ushabti Bone. I then washed the areas that would have shading with Agrax Earthshade, before tidying back up with Ushabti Bone. These were finished with an edge highlight of Pallid Wych Flesh.
With that, you're done! I know it's a lot more involved then most of my step by step tutorials, but painting in this style really lets me achieve the effect I want without having to worry about it being step one, step two, etc. Once you start pushing into higher level painting you'll find that there is a lot of going back and forth between steps. This warband really lets you play around with colors and textures, so don't be afraid to mix things up and try out colors you normally wouldn't.

You can also check out some of my past Masterclass Tutorials like Rippa's Snarlfangs, Hrothgorn's Mantrappers, and Skaeth's Wild Hunt.
Until next time,
Tyler M.
No comments:
Post a Comment