
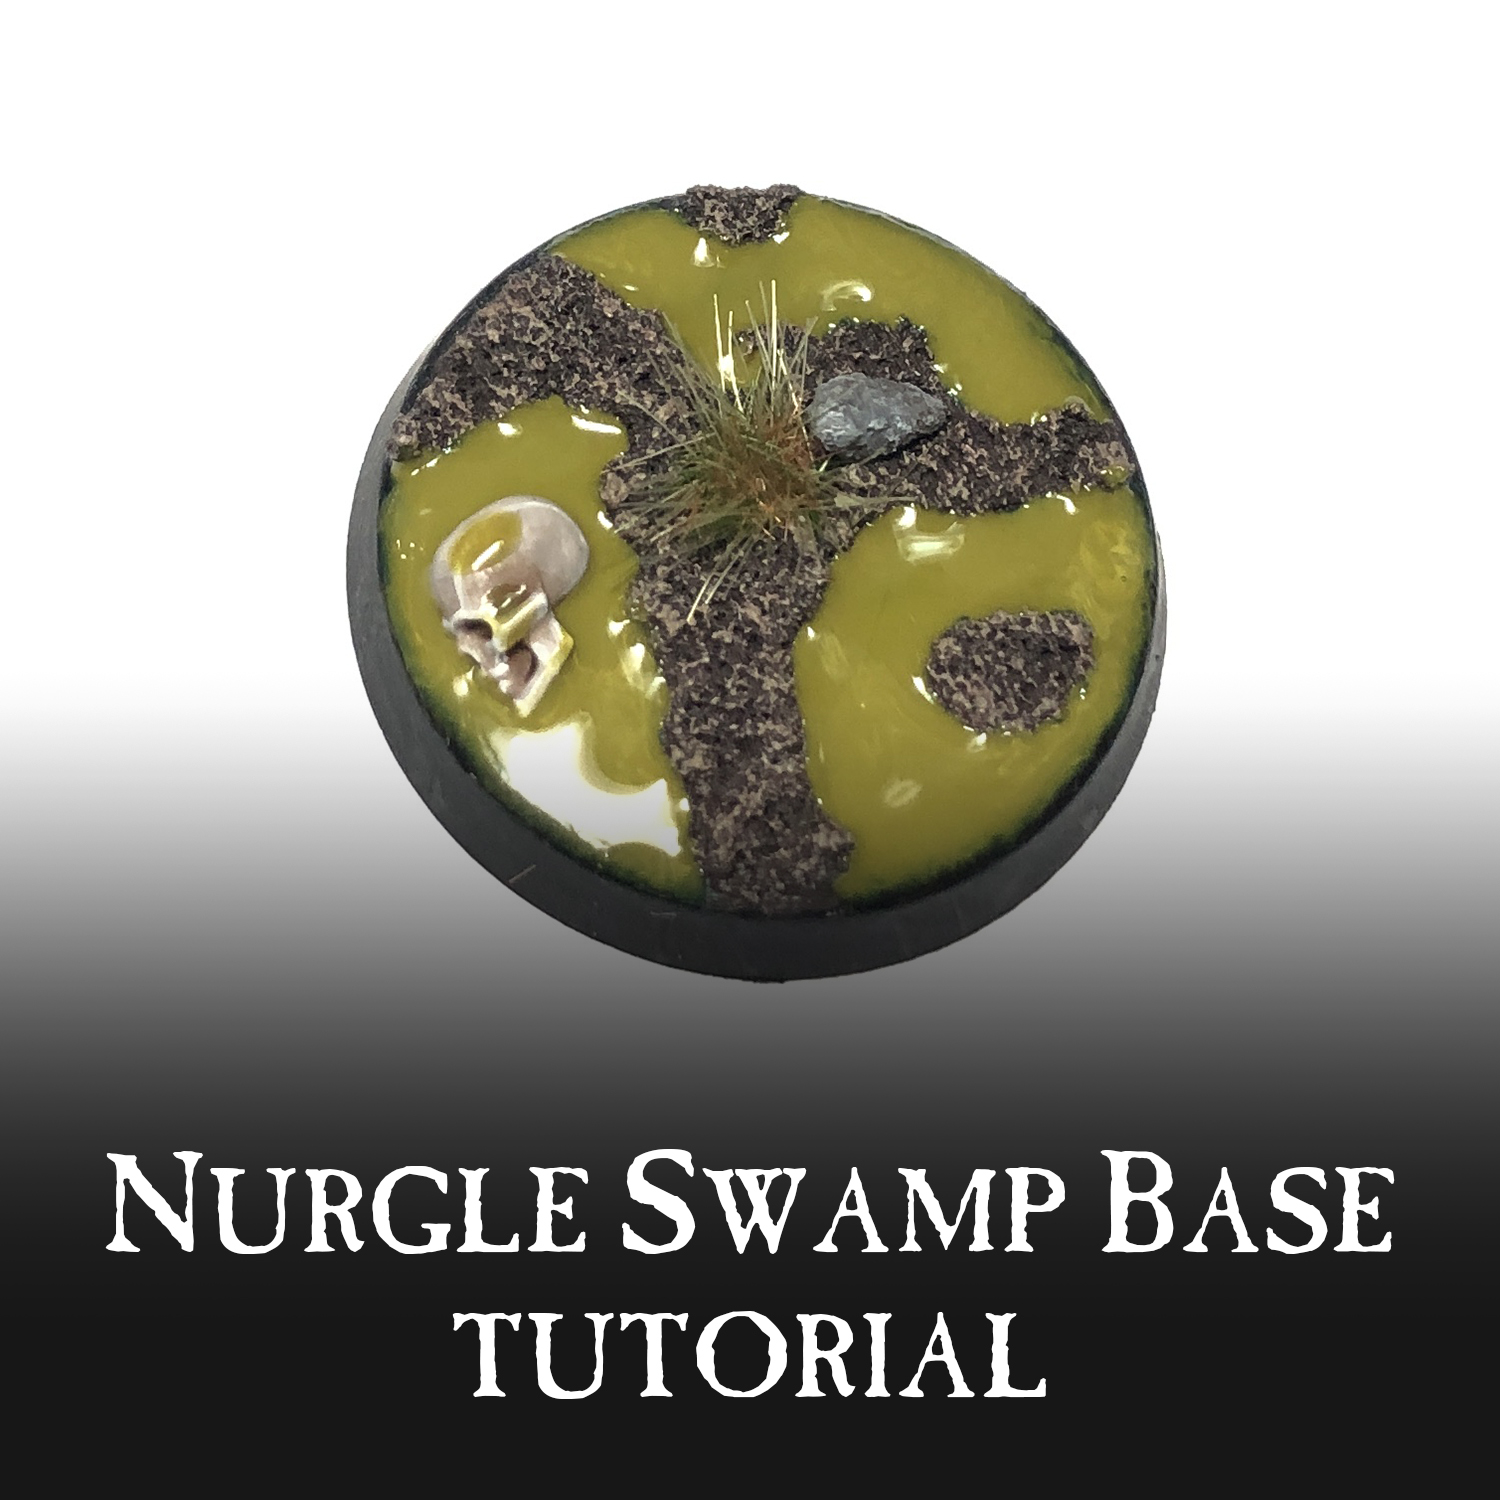
I figured now is the perfect time for a resurgence of a classic tutorial of mine, the Nurgle Swamp Base! Any Maggotkin worth their weight in pustules loves to frolic in a filthy swamp. Now your's can too!
Normally my models are glued onto the the bases before I do this. I'm just doing this base separate for the tutorial. When the model is glued to the base you just need to work around them a bit, but everything is exactly the same as this tutorial.
Step 1.
Usually my bases would be primed with whatever color I primed the model, but for this example I just used an unprimed base. I then put some Stirland Battlemire texture paint (the thicker one) on it in a kind of splotchy, spiderweb pattern. You want to leave the blank areas for the slime later. I tried to make each base as unique as I could, but they all followed the same basic idea.

Step 2.
The dirt areas were then drybrushed with Gorthor Brown.

Step 3.
This was then followed up by a slightly lighter drybrush of Baneblade Brown.

Step 4.
The areas that were left blank for the slime were then basecoated with Caliban Green.

Step 5.
Next I glued some rocks to the base and a skull in the slime area. To do this I cut the skull at an angle so it looks like it's half submerged. Over all of my bases I cut these at various angles to make them different from each other. This is also completely optional if you don't want to have skulls on the base, in which case you can skip the steps for painting it.

Step 6.
The rock was then basecoated with Dawnstone.

Step 7 & 8.
Looks like I forgot to take a picture here, but the rock was washed with Agrax Earthshade and then drybrushed with Dawnstone again.

Step 9.
This was finished up with a light drybrush of Adminastratum Grey.

Step 10.
The skull was then basecoated with Rakarth Flesh.

Step 11.
I then applied some Agrax Earthshade to the areas of the skull that need shadows, which means the face, jaw, and on the side. I left the top alone so I would have less clean up to do.

Step 12.
The skull was then cleaned up with a bit of Rakarth Flesh.

Step 13.
I finished this with an edge highlight of Pallid Wych Flesh.

Step 14.
For the slime effect I painted two layer of Nurgle's Rot onto the Caliban Green areas. Make sure you let the first layer dry completely first.

Step 15.
The final step is to add some grass tufts to it. I used Middenland Tufts for mine.

That's it, your base is now done! It may seem like a lot of steps, but when you're doing an entire unit's bases at once it will go pretty fast. What's better for a Nurgle base than to be covered in Nurgle's Rot?
This would also be great for Kruleboyz bases, I would just skip the Nurgle's Rot step, maybe go with a slightly lighter green instead of Caliban Green, then do several coats of 'Ardcoat. If you're feeling particularly crafty you could even use some water effects from companies like Woodland Scenics instead!
Until next time,
Tyler M.
No comments:
Post a Comment