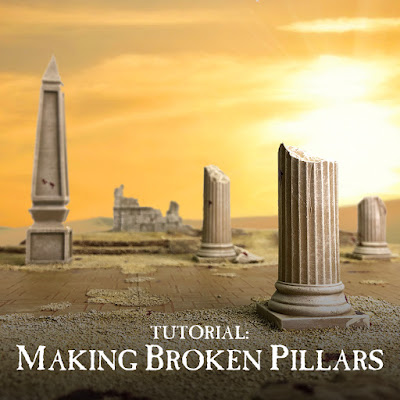
I'm a huge fan of making display boards for my armies, and so far two of them have included some kind of broken pillar. The broken pillar is a staple of both worlds of Warhammer in fact, and would be right at home in the scenery collection of any AoS or 40k player. Luckily there is a quick, and cost effective way to make these byproducts of a war torn environment.
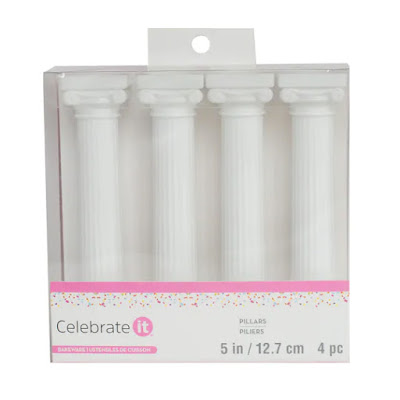
To start with you need a pillar to break. I bought some Cake Pillars from a local craft store, I believe Michael's. These come in a variety of heights and are pretty cheap. The ones I used for my Daughters of Khaine display board were $5.99, though there's almost always some kind of coupon you can apply on top of that. If you're going to break all of them then the height won't matter a whole ton either, so just go for the most for your money.
Step 1.
These pillars all come hollow. The first thing I do is break them. To do this I wrap the pillar in a towel and smack it with a hammer where I want the break to be. The towel will prevent any pieces of it from flying off and also protect the plastic pillar from getting hammer indentations on it. This will give you a nice random break. You can then go in with some clippers and further refine the broken edge into the shape you want. Since these are hollow we will need to fill them. To do that I just balled up some aluminum foil and filled the entire inside of it right up to below the lip of the break.
Step 2.
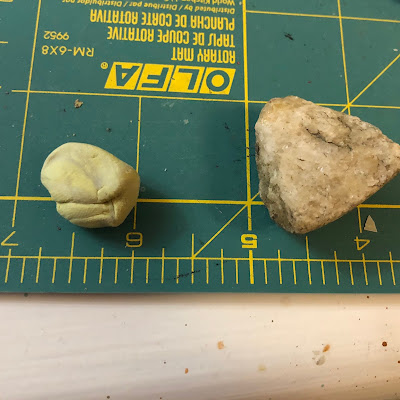
Next you will need some Milliput (or another cheap sculpting putty) and a rock with some good texture on it. Mix your putty up and have the rock handy.
Step 3.
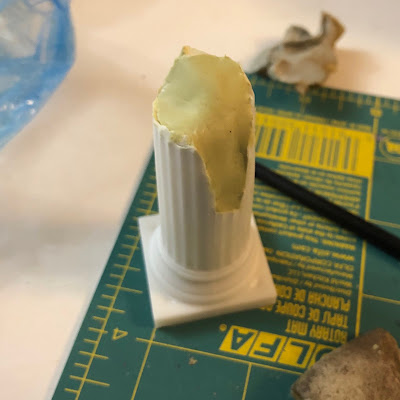
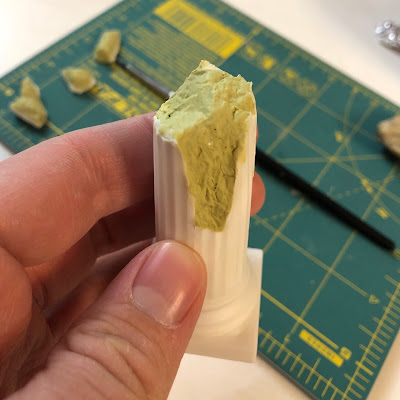
Take the Milliput and cover the foil you stuffed your pillar with. You want it to be flush with the edge of the pillar too, no lip. This is going to be the broken rock of the interior, so you want it to look like it's all one piece.
Step 4.
Lastly, take your rock and press it into the still wet Milliput. This will imprint the rough texture onto the putty and make it look like stone. Be random with this and mix it up with what part of the rock you're using as you press it into the putty. You can also go back in with some sculpting tools, I used a clay shaper, and adjust anything you need to as you do this. Just make sure the putty is still flush with the edge when you're done. That's it! Now just let it dry and you're good to go!
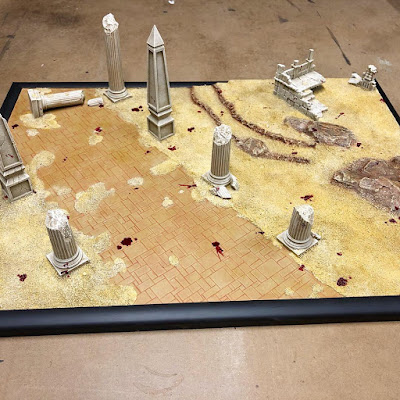
Like I said, I most recently used this on my display board for my Daughters of Khaine last year. You can see how I varied the height of the pillars and also used other parts of it to make broken chunks on the ground next to them. This adds a bit more realism to the piece as realistically a lot of the broken pillars would probably still be close by. I just did a simple base coat and drybrush on these, but you can get as involved as you want.
I actually first used this technique on my Tomb King's display board several years ago. I haven't changed my techniques on it at all in the intervening years since it works so well.
Now get out there and add some broken pillars of your own to your gaming boards!
Until next time,
Tyler M.



No comments:
Post a Comment