
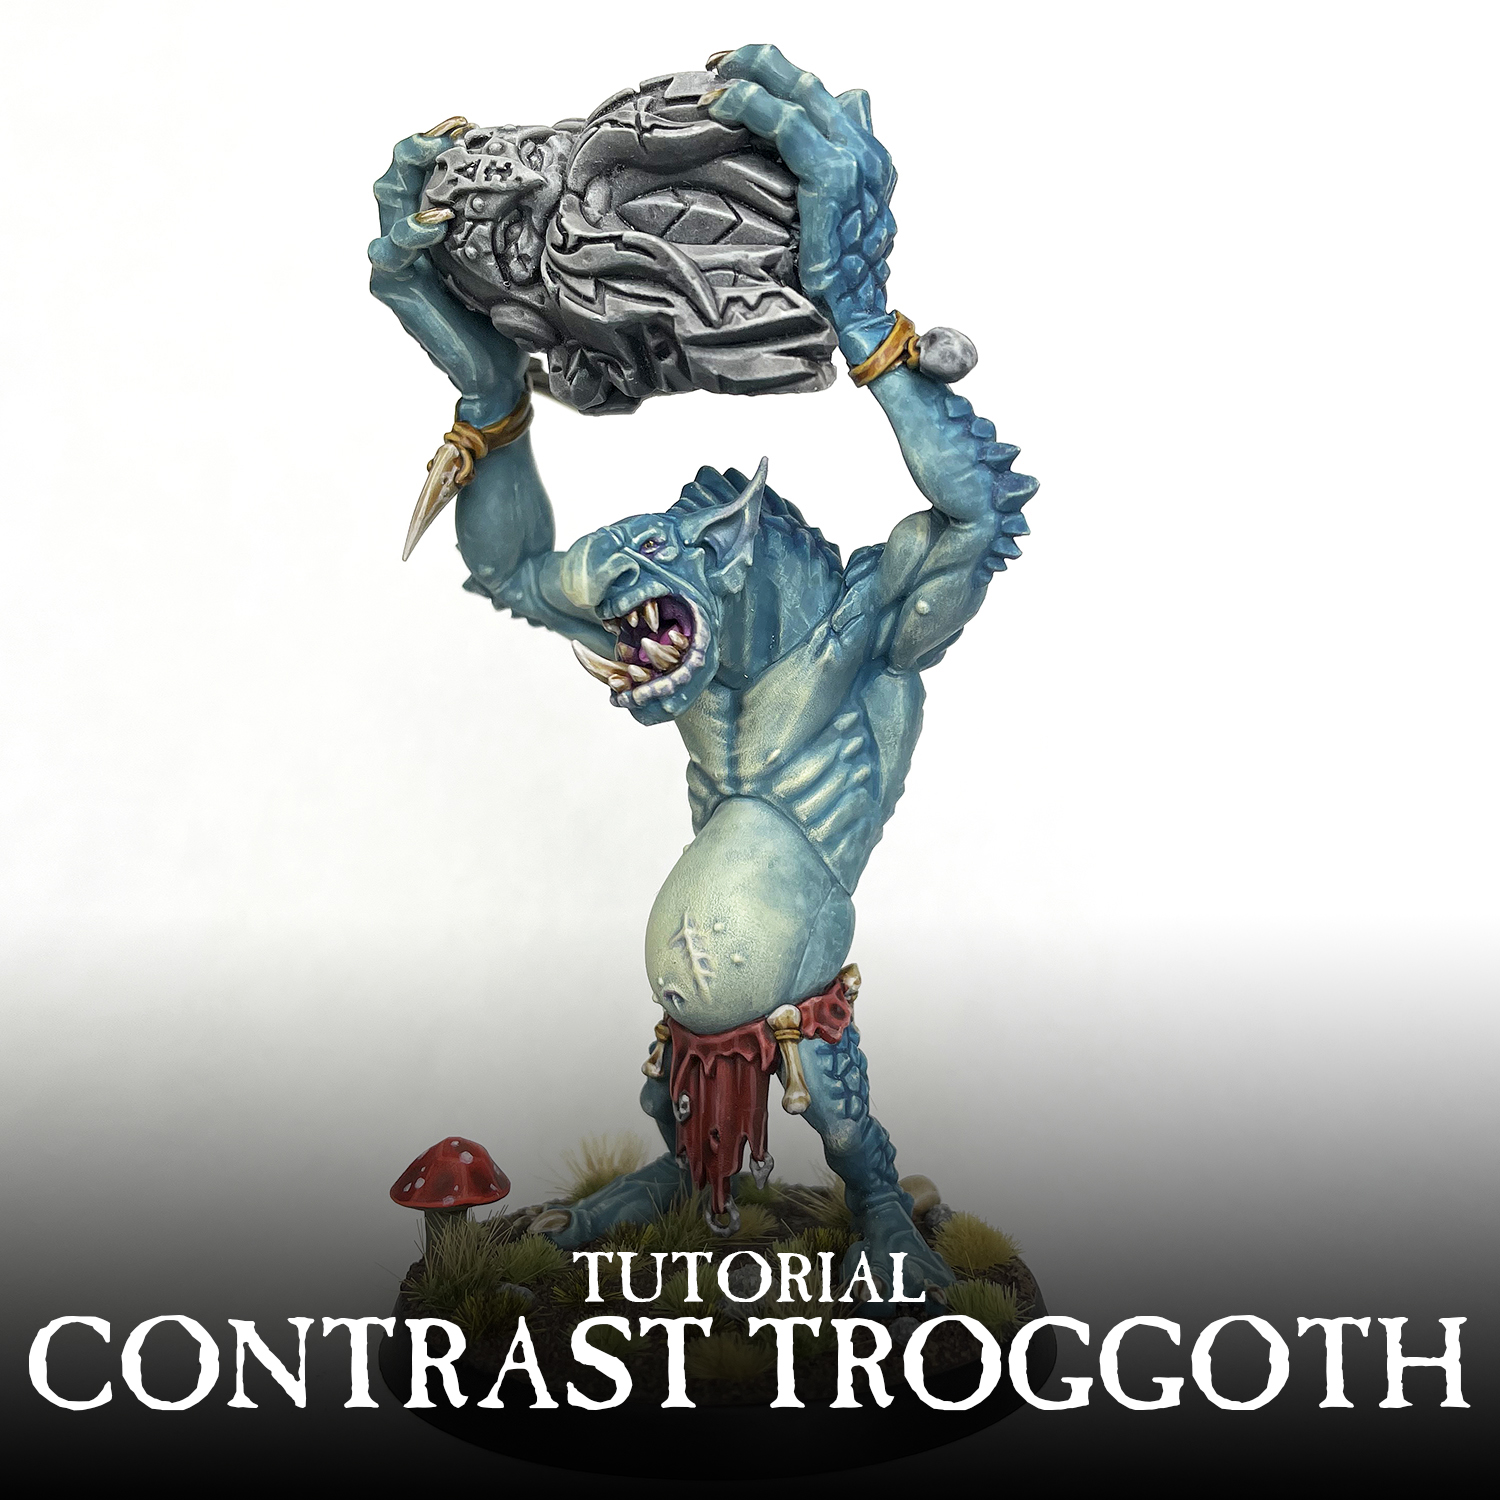
With the release of the new Contrast colors, I figured it would be a good idea to test them out with a tutorial. A few of the colors seemed perfect for the classic Rockgut Troggoth color scheme and I happened to have a few sitting around unpainted. After a quick test on a spare bit of troggoth it was time for the real deal.
First off, I would like to thank Games Workshop for sending me the new colors to try out early. I've actually had these Troggoths sitting around since the new models first came out. I had intended to do a troggoth army, but the project never really got off the ground. I did have a few troggoths already assembled though, so they were ready to go. I had originally primed them Mechanicus Standard Grey for the scheme I had planned at the time, but I worked that to my advantage with this scheme as you'll see. With the exclusion of the eyes at the end, the only brushes I used to paint this model were the M Shade, M Layer, and S Drybrush, all from GW
The Skin

Step 1.
The model was first primed with Mechanicus Standard Grey, and then given a 45 degree (zenithal) spray of Grey Seer. This pre-shades parts of the model by leaving them darker. To be honest, the main reason I did this is because I originally had the model primed dark grey, so I figured I would try out this technique. If you want to, you can just prime the entire model Grey Seer and I don't think you'll see much of a difference.

Step 2.
All of the skin was then given a solid coat of Nighthaunt Gloom (the new contrast version of it). At the same time I had some pure Contrast Medium on my palette and would use it to thin the areas on the model that would be lighter later, such as the stomach, undersides of the arms, etc. I did this by painting the model in chunks. For instance, I did the entire torso in Nighthaunt Gloom, and then while it was still wet I would paint some of the Medium onto the stomach and chest to make it thinner there, and kind of blend it backwards to where I want it stronger. I would then move onto the right arm, then the left, etc. This way the contrast didn't have time to dry on the model before I could thin it. It can have a mottled look to it too, since this is an organic model.

Step 3.
Then, once completely dry, I painted all of the rocky scales with a 50/50 mix of Stormfiend Grey and Contrast medium. I once again had some pure Contrast Medium on my palette that I would use to help blend the Stormfiend Grey into the Nighthaunt Gloom color by thinning it at the edges. I also painted this mix into a few areas I wanted deeper shadows, such as on the face, and between a few muscles.

Step 4.
Next, I drybrushed the whole model with Ionrach Skin. On the scales I did this very lightly, then a little heavier on most of the skin, then the heaviest on the areas like the stomach, chest, nose, and undersides of the arms. On these areas I also used more of a circular motion, especially on the stomach since it's so large and smooth. This helps avoid brush strokes. By easing up on the drybrushing as you approach the darker areas you get a natural fade.

Step 5.
This was then repeated, but even lighter with Deepkin Flesh.

Step 6.
You could call it good here for the skin if you wanted to, as everything after this is just refining it a bit more. I went back in with Ionrach Skin and smoothed out some of the chalkier looking areas, mostly on the nose. I also used this opportunity to add a bit of line highlighting to tighten up the drybrushing. I mostly focused on the face, hands, chest, and a bit on the arms.

Step 7.
Lastly I used Deepkin Flesh to add a few more highlights, but was really restrained with it. Mostly just on the face. The overall amount of edge highlighting I did on this model was really small. Areas like the scales and legs didn't even get touched.

Step 8.
I then painted the inside of the mouth with a 50/50 mix of Sigvald Burgundy and Contrast Medium. I also used a slightly thinner mix of this to glaze on some color on his eyelids, lip, scar, inside of the ears, and knees. You want to be really light with this. Redefine any highlights needed with Ionrach Skin and Deepkin Flesh. I tidied up all of the other areas with Grey Seer before taking this picture as well to get them ready for their own colors.
The Rock

Step 1.
Give all of the rocks a solid coat of Basilicanum Grey.

Step 2.
Next, give it a really good drybrush of Administratum Grey.

Step 3.
Finish it off with a lighter drybrush of Grey Seer.
The Loincloth

Step 1.
You can really use whatever colors you want here, as Troggoths just use random bits of cloth and leather. For mine I did a 50/50 mix of Gore-Grunta Fur and Blood Angels Red for a really nice brownish red.

Step 2.
This was then edge highlighted with Tuskgor Fur.

Step 3.
I finished this off with a bit of Cadian Fleshtone on the most prominent areas.
The Bone

Step 1.
All of the bone areas, including the teeth and nails, were given a solid coat of Skeleton Horde.

Step 2.
These were then highlighted with Pallid Wych Flesh.
Other Leather Bits

Step 1.
I wanted the straps on his arms and the bits holding the bones on to be a different color, so they got a solid coat of Snakebite Leather.

Step 2.
This was then highlighted with Zamesi Desert
Final Details
Step 1.
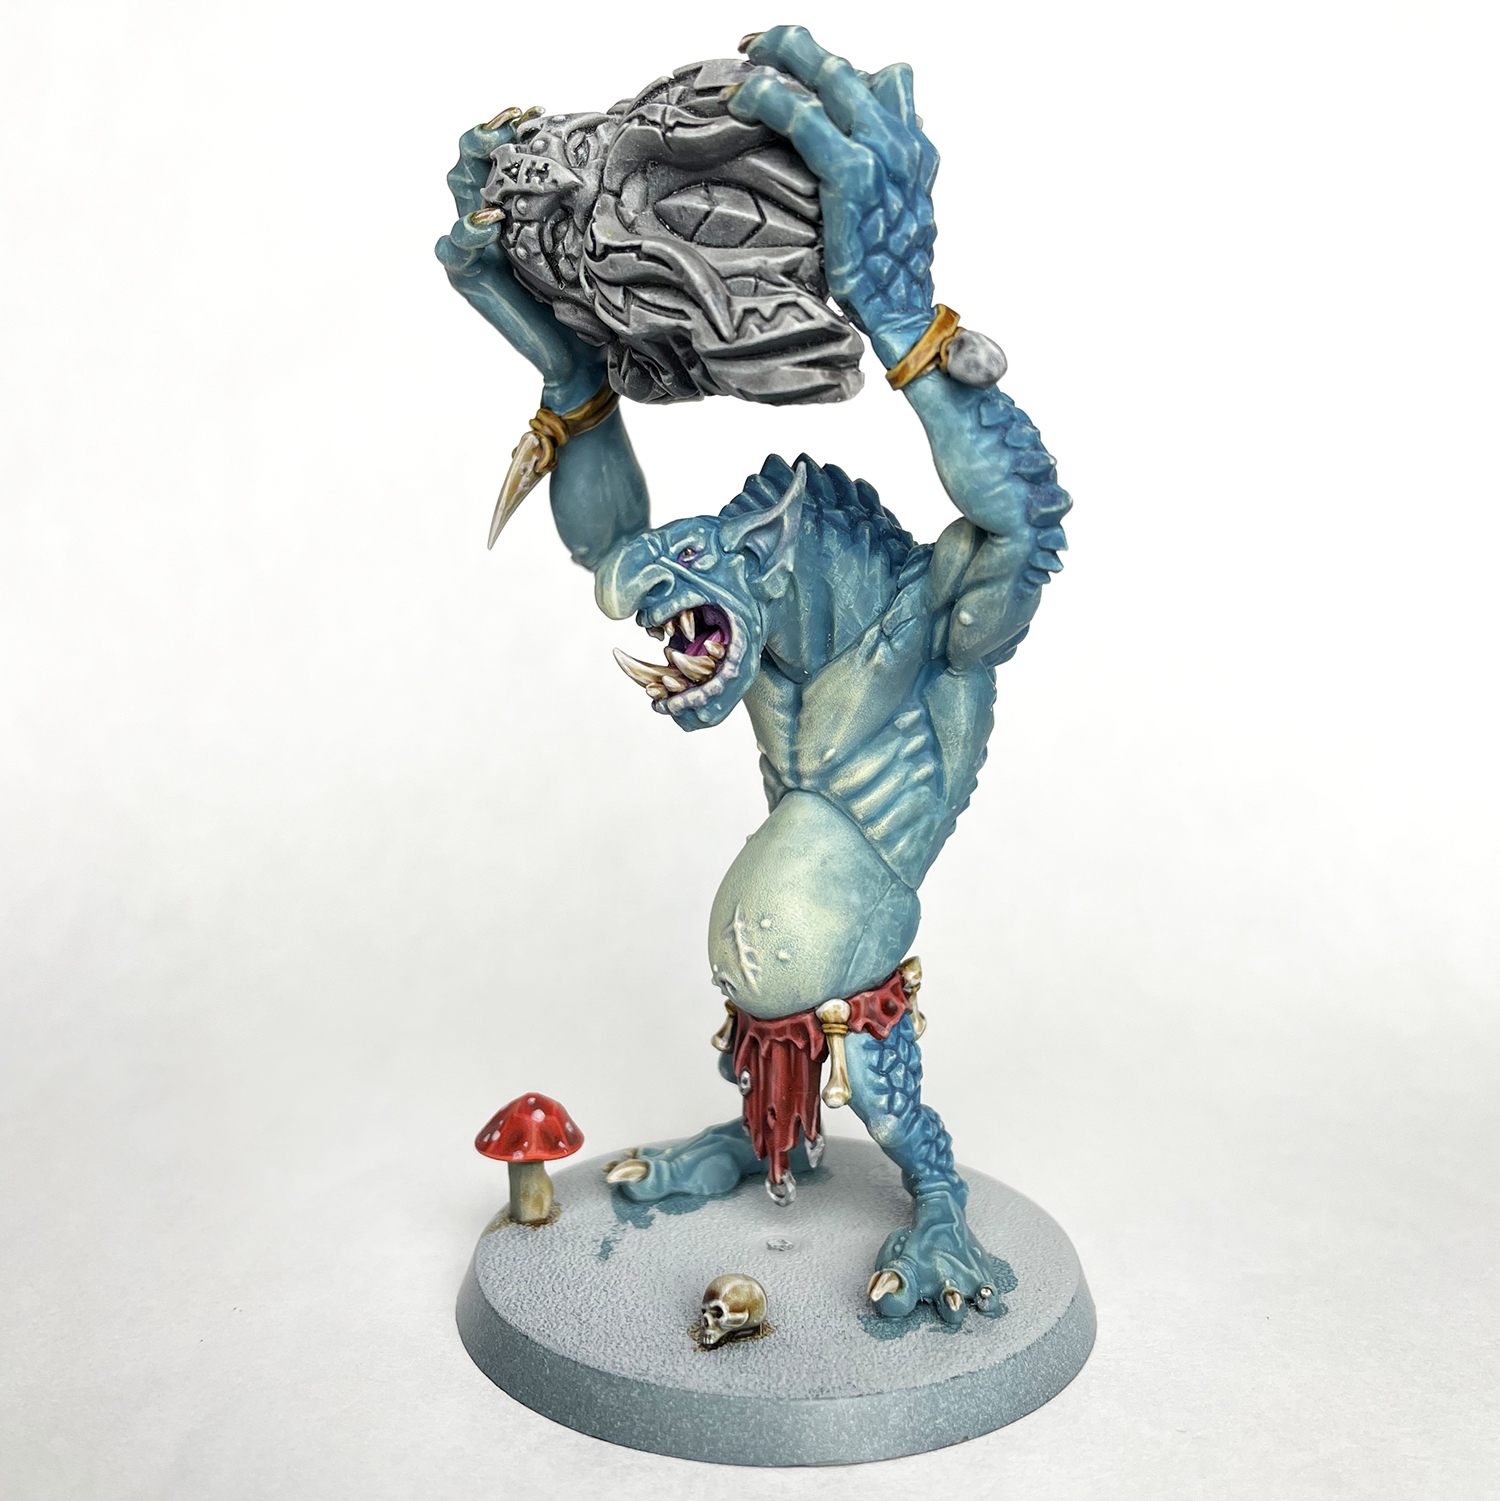
To finish off the model I painted the eyes with Tau Sept Ochre, then Yriel Yellow, before dotting them with Abaddon Black. The mushroom's stalk was painted with Skeleton Horde, and the top with Blood Angels Red. I then highlighted the red with Wild Rider Red and added the dots with Pallid Wych Flesh.


For the grass I used Gamer Grass as they have a great selection. I used about 4 different types of clumps to make it look more varied and natural.

I think this is going to be my Destruction basing scheme so everything ties together. By being a little careful with placement, and using pure Contrast Medium to thin and blend a tiny bit, you can get a lot of mileage out of it, especially with organic models like this, as it will be rather forgiving with blotchiness or other mistakes. I painted this guy in about 4 hours I think, including stopping to take pictures, so without that it would have gone even faster.
Until next time,
Tyler M.
No comments:
Post a Comment