
The most anticipated game of 2019 is almost upon us! Warcry looks to take the Age of Sigmar into a whole new level of gaming, the skirmish level, and the boxed set for it it absolutely chocked full of Chaotic goodness. So what's inside and how does it fare?
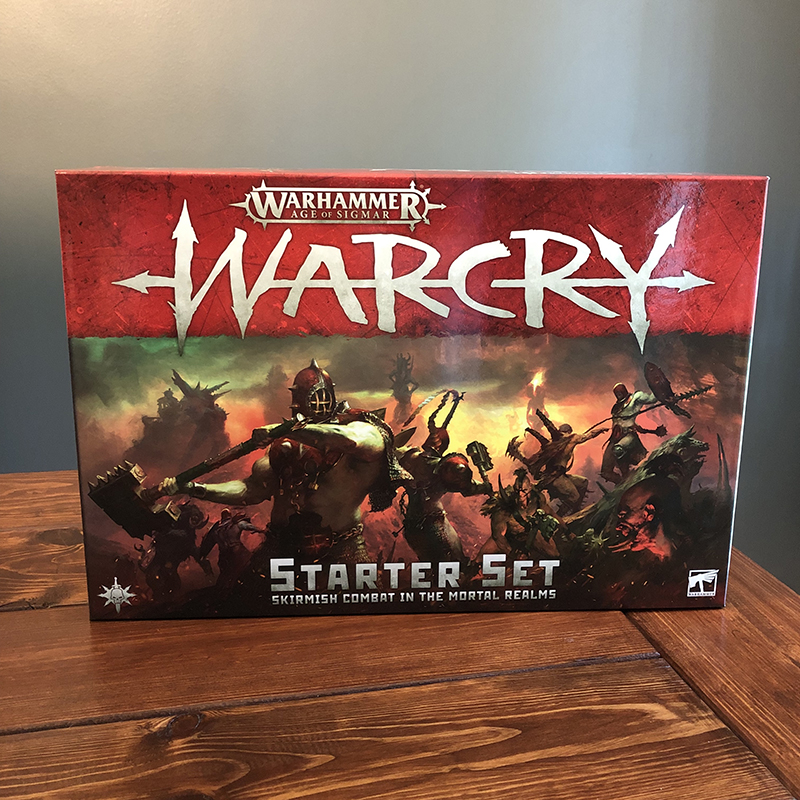
This is one massive box. If you thought the Soul Wars or Dark Imperium boxes were big, you'll be blown away by this. The cover art is nice and swanky and the whole box feels really high end. I know it's not a huge concern, but this is a nice quality box too that's meant to last. If you want to use it for storing some of the game components then it's definitely up for the task.
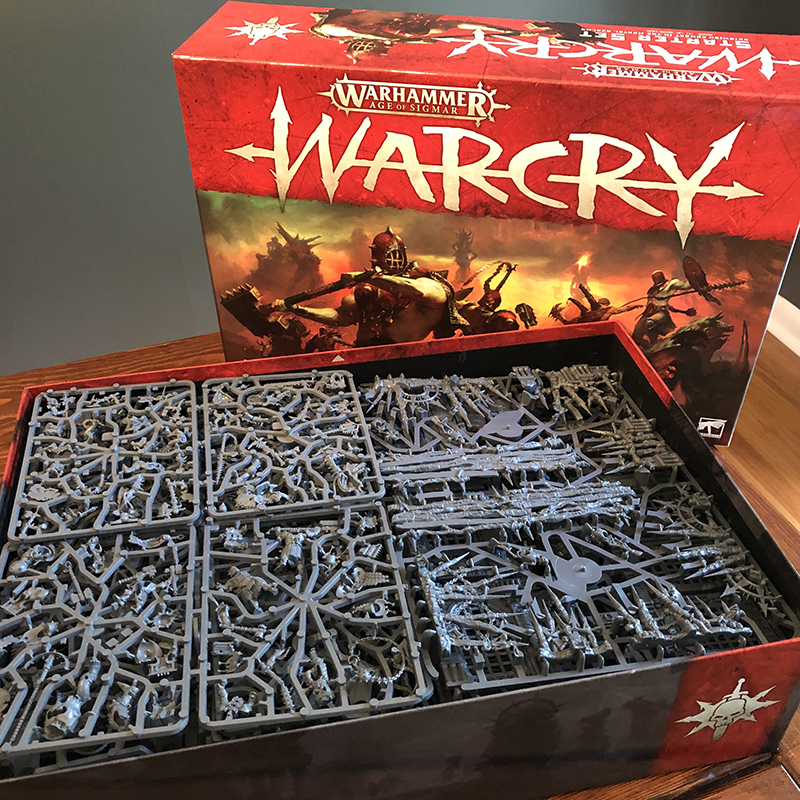
Once you peel off the cellophane and crack open the box you're greeted by a mountain of plastic sprues. It's a bit overwhelming, but in a wonderful kind of way. The majority of the sprues are actually for all of the scenery this comes with. The warbands are only a sprue and a half each, while the monsters take up two sprues, everything else is scenery. Once you dig through all of the plastic you'll find a nice piece of divider art to protect the paper components beneath. You get the full rulebook, the instructions for the models and a cheat sheet for the game, plenty of tokens, the cards for both warbands, the battleplan cards (so you don't need to buy these seperately if you got the starter), a flexible plastic ruler, and all of the bases and dice. Of course we can't forget the game board as well!

This folds up nicely so it stores easily, and is 22" by 30" when fully set up. One side is definitely Chaos inspired and is the side seen in most of the promotional shots, while the other side is a more traditional ruins of Sigmar look that would fit perfectly with the Azyrite Ruins kits. These are both based off of real board set up, as in, it looks like they built these boards using traditional models and then photographed them from a top down view for the board art. They may have had some elements added digitally afterwards, but it's hard to tell if they did. By making it double sided it gives you a bit more variety in your games.

The models themselves look amazing. As of writing this I've only been able to put together a few of the fighters and none of the scenery, but everything goes together really smoothly. They aren't push fit, but they aren't difficult to assemble either. On the Iron Golems most of the seams are hidden except for on some of the hammers, but all in all it's pretty good. They come with a few different weapon options on some of the models. Some of these are just aesthetic differences, while some actually have in game abilities that differ. In the case of those ones the instruction booklet makes sure you're aware with big red boxes that call out the two different builds so it'll be hard for you to miss. Some of the fighters also go on a new 28mm base, half way between the old 25mm and 32mm, so make sure you're paying attention to that when gluing them down. I would also take care not to lose those 28mm bases, since as of right now you can't buy them seperately on the GW website, though I suspect that will probably change in the future.

According to the instruction booklet, a lot of the scenery can be built in any way you want. The only ones that have specific builds are the bell tower and the statue head, the main builds are completely customizable. You can make several smaller buildings, one large one, or something in between. I would probably make something pretty close to what they recommend though since the battleplan cards show you the scenery layout for your games and you'll want to be able to choose something close to what they're showing if not exactly the same thing. According to Ray Dranfield on Twitter, the creator of most of the AoS and 40k scenery kits, these ruins are designed to be bashed together with the Azyrite Ruins kits if you want as well, really opening up the possibilities.

The dice are nice and simple, just three different colors, one for each player plus the wild dice. They have regular pips and a symbol on the six, making them really clear and easy to read at a glance.

The rulebook itself is a soft cover book. It feels a little more bendable than I'm use to, but it's probably a better choice for a game like this over a hardcover book. The book starts off with the lore section, which is a little briefer then we're used to from AoS products, but that's okay since there really isn't a whole lot to set up. This game is all about telling your own stories, so all it has to do here is give you the foundations. There are three awesome looking two page spreads that kick it off, each with a bit of lore. Essentially the games takes place at the Eightpoints, the island realm that's host to the Varanspire at the center of the different realms. Here various warbands, primarily Chaos, try to answer the call of Archaon and gain his attention and a spot within his legions. The Eightpoints is a vast area and encompasses many different environments, cities, and ruins of old. Warcry starts us off within the Bloodwind Spoil, the tract of land between the gates to Chamon and Ghur. We get a cool map that details a good chunk of this area. I really like that they made the Eightpoints so large since it allows them to really explore a ton of environments all within a setting that makes sense.

After this each of the warbands that have been previewed, as well as two that haven't, the Scions of the Flame and the Spire Tyrants, get a small bit of detail. This is only about a paragraph or two to give you a basic idea of who they are and where they're from. Each of these is accompanied by a really stylish and cool looking silhouette of one of the warriors. It also then goes over some of the other warbands you can use in Warcry outside of the Chaos ones made just for it. These include Stormcast, Deepkin, Daughters, Ironjawz, Bonesplitterz, Gloomspite, Nighthaunt, Flesh-eaters, and Nighthaunt. Only the Gloomspite, Stormcast, and Nighthaunt get featured in this section of background lore though.
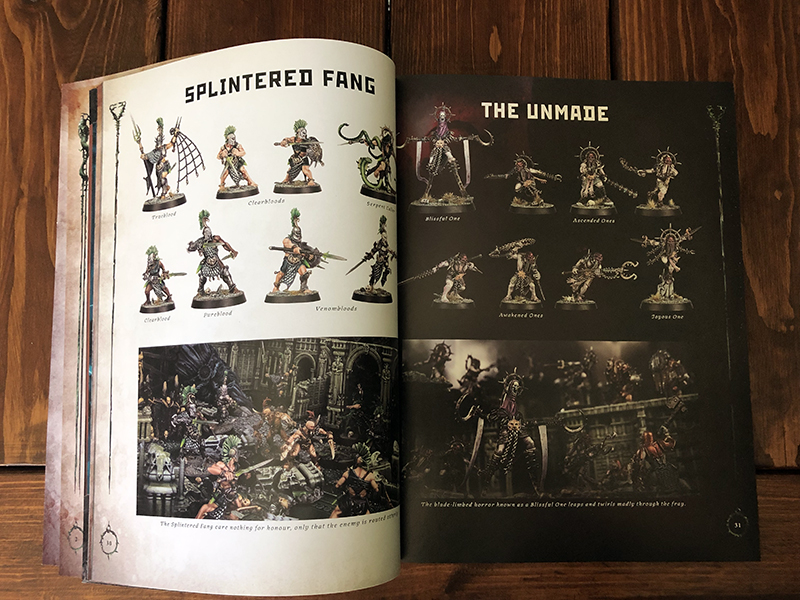
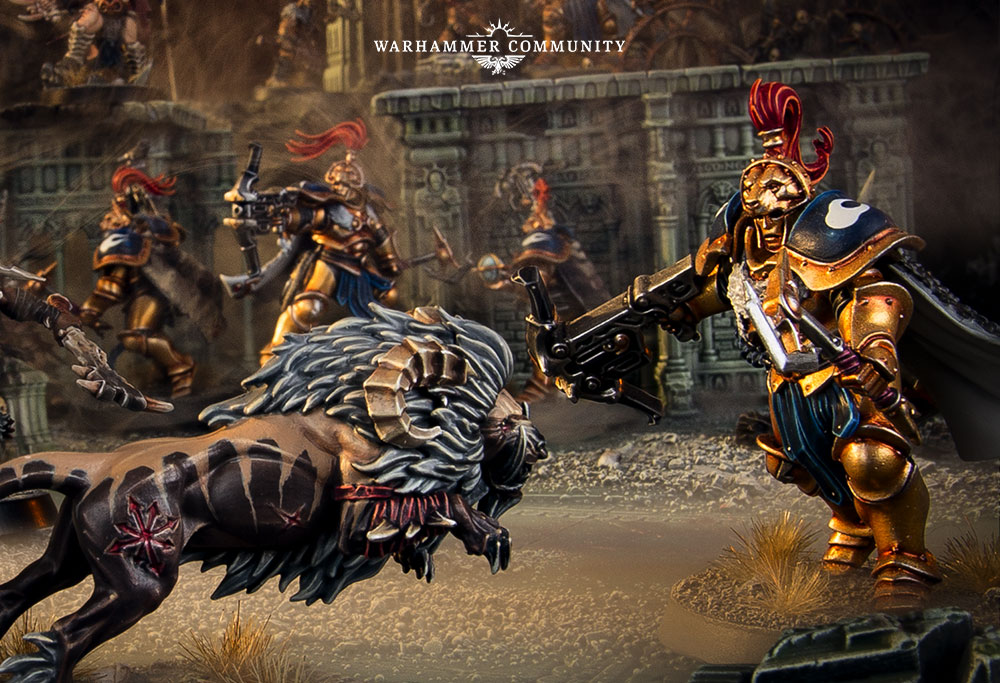
The photography section basically just shows off each of the six previously revealed Chaos warbands, with each model and its name as well as a scenic shot of it.

With that we're onto the rules. The core rules for the game are actually pretty short. It goes over the basics of what you'll need to play the game, including all of the cards and tokens included in the box, and then delves into the rules proper. Before the game begins you need to divide your warband up into three sections, the Shield, Dagger, and Hammer. Each group has to have at least one model in it and can't have more than half your warband. Also, the Shield must have at least a third of your warriors in it. Setting up a game is really easy with the battleplan cards. Both players roll off to determine who will draw the cards, the winner then randomly draws a card from each of the four decks, the Terrain, Deployment, Victory, and Twist decks.

The Terrain cards show you how to layout your scenery. I am interested to see how this goes if you happened to build your scenery in a way that doesn't lineup with how they have. I imagine you can just set it up as close to how they did as possible. The Deployment cards show you how your warband deploys. Most of them have one of the three sections of your warband starting on the board somewhere, with the other two coming on in the second turn, but there are variations on this. The Victory decks tells you the conditions you need to meet to win. These can range from capturing objectives to killing all of the models in your opponent's Dagger, to anything else in between. These will also tell you how many turns the game lasts for. The Twist cards do exactly what they sound like they do, add a twist into your game. For example, No Respite adds 2 to the values of fighter's abilities in the first battle round, while Murky Swampland subtracts 1 from your movement if you're on the ground and can't fly. If you lose your cards they have some of these printed in the back of the book for you so that you'll still be able to access them.

The battle round is divided into three sections, the Hero Phase, Reserve Phase, and Combat Phase. In the hero phase you both roll six dice and consult your results. Any doubles, triples, or quads, dice that have the same number, such as if you roll two 3s, are set to the side. You then count up your singles, dice that don't have any duplicates in your roll, and compare that to your opponent. Who ever has the most singles gets to go first that battle round. You'll be using your duplicates later in the round though for abilities, so you'll most likely want a good amount of those. Each battle round you get one wild dice. You can use this to add to your roll, for example, to add another single to gain the initiative, or to make something into a double or a triple. You can choose to not use your wild dice instead and save it for a later battle round as these don't go away between rounds. This seems like a really fun and cool mechanic, especially once you understand what the duplicates are used for. If the number of singles is ever a tie then you just roll off to see who goes first. The Reserve phase is when you bring on any models that didn't start on the board. Your deployment card will tell you when and if you do this. These are set up wholly within 3" of the board edge where the card says for them to come on.

Next is the Combat Phase, which is basically when everything happens. Each player takes it in turns activating a fighter. When activated a fighter can make 2 actions, either Move, Attack, Disengage, or Wait. If a fighter moves they can either make a normal move, jump, climb, or fly. Their move value will be on their fighter card. A normal move is just what it sounds like. You can't move through models or terrain, or off the board or anything, but otherwise it's just moving the model their move value. To jump you can move horizontally across any gap, such as between buildings, as long as their move value covers it. They can also move any distance vertically downwards, but if it's too big of a drop then they suffer Fall Damage. Basically they suffer some impact damage from falling. They can also be knocked off of ledges by opposing players, so you'll want to be careful along ledges that don't have a rail. Climbing is moving vertically up a terrain feature, while flying is just a normal move that ignores all vertical distances. So you can fly from the ground up onto a building by just measuring the horizontal distance.
The attack sequence is really easy. On each fighter's card their weapons will be listed with a range, attacks characteristic, strength, and damage value. You have to be within your range to attack an enemy, then you roll a number of dice equal to your attacks. You then compare your weapon's strength to the toughness value of the enemy model. If your strength is greater you hit on a 3+, if it's the same it's on a 4+, and if the strength is less than the toughness then it's a 5+. A roll of a 6 always causes a critical hit. You then allocate any damage from your hits. Each weapon will have a damage characteristic that's two number separated by a slash, such as 2/4. In this example a normal hit would do 2 damage while a critical would do 4 damage. So if we rolled 4 dice and scored one regular hit and one critical hit then we would be doing a total of 6 damage. Once a fighter has taken more damage than they have wounds they are taken down.

Disengage actions are for if you're within 1" of an enemy fighter and want to do anything besides attack. You must do this action first before you can do anything else besides fight the enemy model. So if you wanted to run away from an enemy model you would first have to Disengage with your first action, then you can move normally with your second action. The Wait action is doing nothing. If you do this as your second action nothing happens and that fighter's activation is over, but if you do it as your first action then you don't make a second action right away, and instead can come back to this fighter later when it's your turn to activate and complete their second activation. So if you wanted to see what your opponent did first before doing something you could have a fighter Wait, and then later in the turn activate them again and have them move or attack or something. That covers all of the basics of a turn. There are then rules for terrain, covering the different types.

The rules for the beasts, like the Furies, are included as well. If a twist calls for beasts to be on the battlefield then you can choose to activate one instead of one of your fighters. You then need to roll a dice and on a 3+ you can activate it like a regular fighter, while on a 1-2 your opponent gets to activate it and you essentially lose your activation. So it's a bit of a gamble, but it can be worth it if you want to try and attack your opponent with one or even just move one away from your own fighters. In a campaign there are also ways that you can include some of the beasts in your warband as thralls.

We then go into the three different ways to play the game, Open, Narrative, and Matched Play. Open play mostly covers ways to play games of more than two players with rules for Triumph and Treachery and Coalition of Death. These have their own set of deployments and victory conditions as well as different rules for setting up terrain. Narrative is the main way to play this game using the campaign feature, so I'll go into more detail on this in a moment. Matched Play is for Tournaments and pick up games. It has it's own set of balanced deployments and victory conditions, plus it tells you to only use terrain set ups marked as symmetrical so that it's even. There are 12 battleplans for Matched Play in total included in the rulebook.
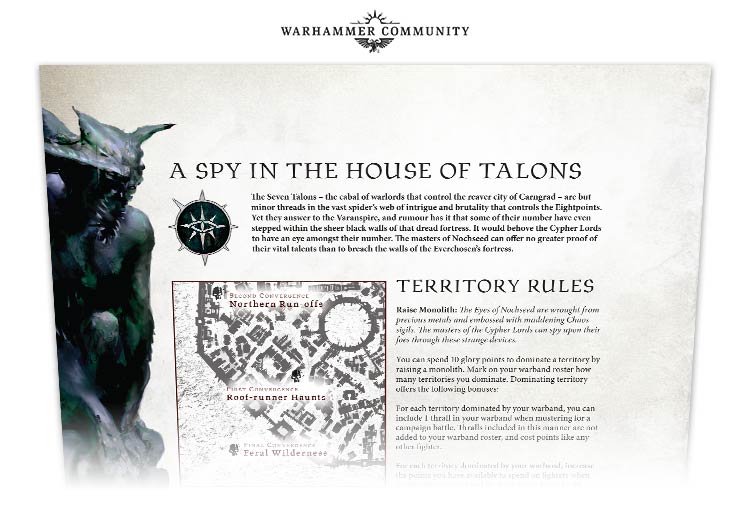
So, now onto the coolest part of the book and the parts that takes up roughly half of the pages, the Narrative and Campaign rules! This, to me at least, seems like the best way to play the game. To play a narrative campaign you first need to generate your warband. You have to have at least 3 fighters and can have up to 20. There are also name and background generators for all of the warbands included in this book. Your games start at 1,000 points and as your progress you have the opportunity to earn more points to bring more models into your games. Essentially your warband roster is just a list of your fighters, and for each game you can decide which ones to take depending on the points available. After each Narrative game in your campaign you need to add up the glory points you've earned and see what you can spend them on. You can purchase the opportunity to roll for a second piece of treasure (you get to roll for one just for playing in a game), dominate territory, or hang onto them for future use. When you find treasure you assign it to one of your fighters and it stays with them until you use it or it goes away for other reasons. You also need to roll for each of your fighters that were Taken Down during the game to see if they die, are injured (lose a destiny level), or are fine. Your leader can't die. You also need to roll for each fighter that was not Taken Down and on a 6 they gain a level of Destiny. You can gain up to 3 levels. Each level grants you a re-roll in future games for that fighter. Dominating territory gives you more points to use in your games, and if you're Chaos, also lets you take a beast as a thrall, though you still have to pay for the points for it as normal.

Each warband has a cool little campaign to play through. The Chaos ones for this game each have two unique campaigns, while the other factions, like Stormcast and Gloomspite only have one each. This is something I can easily see them supplementing in White Dwarf and the like in the future. There's a little bit of narrative and you can earn Artifacts and Command Traits as you play through it. There are 12 battles you have to play through, three of which are specific battles called Convergences. These are important moments in your warbands history. On your campaign roster sheet it will show you which battle is the Convergence, for example, the first Convergence is going to be your third battle. These have a bit of narrative assigned to them as well as specific terrain layout and victory conditions. You're not allowed to progress past these until you have won them. Normally, if you lose a game, you still progress along the campaign tract, with the ones though you'll have to replay them until you win. Think of them as boss battles. At the end of the campaign you can flip to the back of the book and read the concluding lore for it (don't read these early!) and also get a specific reward for winning. Once you've completed one of your campaigns you can just hang around your newly dominated territory and play more games with all of your bonuses, or start on a new campaign, in which case you lose all of your territory (since you left it), but you keep all of you treasures, traits, destiny levels and so forth.

The best thing about this campaign system is that it's specific to you. You can play anyone, it doesn't have to be a specific group of people. Go down to your local store and just ask someone if they want to play a game in your campaign. For them it'll just be a fun game, or even a battle in their own campaign, but for you it advances your specific warband. The only restriction is that if you're both playing a campaign and you're both at a Convergence battle you can only do one at a time since they'll have different layouts and victory conditions and so forth. The back of the book has a copy of the warband roster for you to photocopy, but I would be surprised if they don't make it available online as a PDF later.
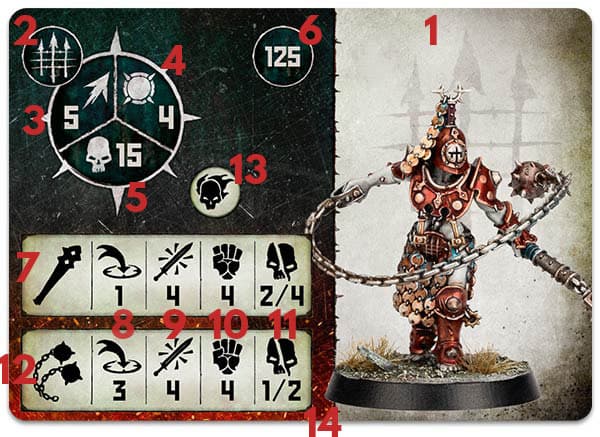
Lastly, lets talk about the fighter cards. Each warband gets a set of fighter cards, one for each type. These will have the fighter's stats, such as wounds, move, toughness, and also their weapons and those weapons' stats. They'll also have their points costs and any runes associated with them. The runes are like keywords, but pictographs instead of words. It may seem confusing at first but it's really pretty easy. Mostly these will correspond to abilities. Each warband has a set of abilities, and there is also a set of universal abilities. These are special things you can do during your activations. They will each have a cost in the form of a double, a triple, or a quad. This is where those ability dice come into play. So if you want to use an ability that costs a double then you'll need a set of double dice from your initiative roll. Sometimes the value on the dice matters sometimes it doesn't. For example, an ability may deal damage to an enemy and cost a double, with the value of the damage dealt being equivalent to the value of the dice. So if you had two 3s that you spent to use the ability it would do 3 damage. Some abilities will have no runes next to it, like most of the universal abilities, which means anyone can use them. Others will have one or more runes. Any of the abilities specific to your warband will have your warband's rune on it, meaning only they can use them, and then some will have additional runes, like the rune for Leader, meaning only a fighter that also has a Leader rune on their card can use it. Since you'll have all of these cards laid out in front of you when playing it will be pretty easy to know what does what. Any ability dice you don't use by the end of the battle round are lost when you make your next initiative roll, so it's better to just use what you have.

I managed to play a test game using my Daughters of Khaine and my Nighthaunt. I had to sub in some other scenery since I didn't have anything from the box built yet. It was a ton of fun and only took about an hour. Both warbands felt true to their lore, with the Nighthaunt being super tough and the Daughters being much more fragile but with the ability to dish out a lot of attacks. The victory conditions I drew meant that the Shield section of my Nighthaunt had to survive till the end of round 4, which they barely did. In the end it came down to the Heartrender missing all of her attacks against the Spirit Host in the last turn. I was also able to bring my Spirit Host back twice during the game, though not at full health. This was an ability that my leader had and definitely won the game for the ghosts. I went through the end phase too just for fun, and a Witch Aelf and Chainrasp ended up dying for good, while one model in the DoK warband and three in the Nighthaunt ended up gaining a level of destiny. I'm definitely looking forward to playing more games and with how quick these can go I think you could easily get int 2-3 games during the amount of time it would take you to play a regular game of AoS.
Until next time,
Tyler M.
No comments:
Post a Comment